
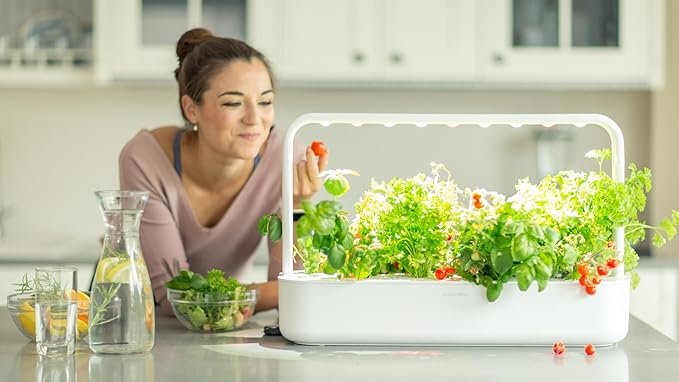

Planting Your Smart Garden 9: Easy Steps for Growing Herbs in Abu Dhabi
Ya salam, fellow plant enthusiasts! If you’ve been following along, you know the excitement has been building. We’ve unboxed our incredible smart garden, admired its sleek design, and now, finally, it’s time for the moment we’ve all been waiting for: planting! There’s nothing quite like the feeling of setting up your very own indoor farm, especially here in the heart of Abu Dhabi, knowing that fresh, homegrown herbs are just weeks away.
Today, we’re diving into the super simple steps to get your Click & Grow Smart Garden 9 up and running. Trust me, if I can do it after a long day in the Dubai heat, anyone can! This system truly makes gardening effortless, and if you’re curious about getting your own smart garden, I highly recommend checking out the Click & Grow Smart Garden 9 – it’s been a game-changer for me!
Here’s how we plant our smart garden pods and kickstart the growth cycle:
- Step 1: Unpack Your Plant Pods. Your Smart Garden 9 comes with a selection of plant pods, usually three mini-tomatoes, three basil, and three lettuce to get you started. Gently remove them from their packaging. Each pod is a little self-contained wonder, ready to sprout!
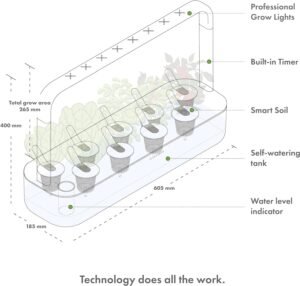
- Step 2: Place Pods into the Cups. You’ll see nine planting cups on the garden’s deck. Simply drop one plant pod into each cup. There’s no need to push or force them; they fit snugly. Make sure the little label on the pod is facing upwards so you know what you’ve planted!
- Step 3: Fill the Water Tank. Now for the essential part – water! Locate the water reservoir at the base of your smart garden. Fill it with fresh, room-temperature water up to the ‘MAX’ indicator.UAE Indoor Gardening Tip 1: While the Smart Garden 9 is brilliant at managing water, in our dry UAE climate, plants can sometimes be thirstier than expected. I’ve found that using filtered water (like from a Brita jug) instead of direct tap water can make a difference, as our desalinated tap water can sometimes have mineral variations that sensitive young plants might not love. Keep an eye on that water level indicator!
- Step 4: Plug It In and Let There Be Light! Connect the power adapter to your smart garden and plug it into a wall socket. The LED grow lights will automatically switch on. These lights operate on a specific cycle (usually 16 hours on, 8 hours off) to mimic natural daylight.UAE Indoor Gardening Tip 2: Consistency is key for light. Even though our apartments might have bright windows, the smart garden’s integrated grow lights are specifically tuned for optimal plant growth. Try to place your garden where its light cycle won’t be heavily disrupted by other strong artificial lights or inconsistent natural light, especially during its “off” cycle. This helps prevent leggy growth and encourages strong, healthy plants.
- Step 5: Add the Domes (Optional but Recommended for Germination). If your kit came with clear germination domes, place one over each plant pod. These little domes create a miniature greenhouse effect, trapping humidity and warmth which greatly aids in germination, especially in our air-conditioned environments. Remove them once seedlings touch the dome or after about 1-2 weeks.UAE Indoor Gardening Tip 3: Our indoor humidity levels can be quite low due to air conditioning. For the first few days, these germination domes are gold. They maintain a stable microclimate, which is crucial for seeds to sprout successfully. Monitor them daily; once you see little green shoots, you can start to remove the domes gradually to acclimate them to the ambient air.
And just like that, you’re done with the setup! Now comes the exciting waiting game. Over the next few days and weeks, you’ll start to see tiny green shoots emerge from the pods, reaching for the light. It’s truly a magical transformation right in your living room.
Next up in Part 6, we’ll be talking about those first glorious sprouts, what to expect in the early days, and how to troubleshoot any minor issues as our Smart Garden 9 truly comes to life! Get ready for some serious green therapy!
Catch Up on the Series:
- Indoor Gardening Solutions in Dubai: Finding a Green Oasis for Your Home
- Introducing Click & Grow Smart Garden 9: The Perfect Fit for UAE Homes
- Unboxing the Click & Grow Smart Garden 9 in Dubai: First Impressions & Setup
Pro Tips for Thriving Herbs in Abu Dhabi’s Smart Gardens
Leverage these advanced, experience-based insights to elevate your herb cultivation in the unique Abu Dhabi climate:
Strategic Microclimate Management for Humidity & Temperature
Don’t just shade; actively manage your herbs’ immediate environment. In Abu Dhabi’s low humidity, creating a localized microclimate is key. For sensitive herbs like basil or mint, place your smart garden in a spot with morning sun and afternoon shade, or under a 30-50% shade cloth. Utilize humidity trays (trays filled with pebbles and a shallow layer of water beneath your pots, ensuring the pots don’t sit in the water) to increase ambient humidity directly around the plants. This counteracts the drying effects of the desert air and high temperatures, significantly reducing plant stress and improving foliage quality.
Advanced Nutrient Cycling & pH Balancing in Hard Water Conditions
Abu Dhabi’s tap water often has a high Total Dissolved Solids (TDS) content, leading to rapid salt buildup in container media and potential nutrient lockout. For soil-based smart gardens, implement a monthly “leaching” flush with distilled or reverse osmosis water to prevent mineral accumulation. For hydroponic or semi-hydroponic systems, monitor your nutrient solution’s Electrical Conductivity (EC) and pH daily. High temperatures accelerate water evaporation, concentrating salts; adjust your top-ups with plain water or a weaker nutrient solution. Aim for a slightly acidic pH (5.8-6.5) to ensure optimal nutrient absorption, as alkaline conditions can render essential micronutrients unavailable.
Integrated Pest Management (IPM) for Arid Zone Pests
While some pests struggle in the heat, arid conditions are perfect for others like spider mites, thrips, and whiteflies. Implement a proactive IPM strategy. Regularly inspect the undersides of leaves with a magnifying glass. Introduce beneficial insects (e.g., predatory mites) if your smart garden setup allows for controlled release. For early infestations, use a strong jet of water to dislodge pests, or apply organic neem oil spray during the cooler evening hours (never in direct sun) as a preventative and treatment. Ensure excellent air circulation around and through your plants, as stagnant, warm air significantly increases pest susceptibility.
Frequently Asked Questions About Growing Herbs in Abu Dhabi