As a devoted plant parent, few sights are as concerning as a thriving plant suddenly showing signs of distress. Often, the culprit isn’t disease or pests, but a condition known as being ‘root-bound.’ This occurs when a plant’s root system has completely filled its current container, leaving no room for growth, nutrient absorption, or proper water penetration. Learning how to repot a root-bound plant step by step is a fundamental skill for any US plant enthusiast, ensuring the long-term health and vitality of your green companions. This guide will walk you through the process, transforming your congested plant into a flourishing specimen once more.
Identifying a Root-Bound Plant
Recognizing the signs of a root-bound plant early can save it from significant stress. The most obvious indicator is roots growing out of the drainage holes or circling tightly at the bottom of the pot when you gently lift the plant. You might also notice stunted growth, despite adequate light and water, or a plant that wilts frequently, even after recent watering, because the dense root ball prevents water from reaching all areas effectively. Another sign is the pot itself bulging or cracking under pressure from the root mass. If you suspect your plant is root-bound, carefully slide it out of its pot to visually inspect the root system. A dense, matted ball of roots confirms it’s time for an upgrade.
Preparing for a Successful Repot
Before you begin the repotting process, gathering the right supplies and setting the stage is crucial for a smooth transition. The ideal time to repot most houseplants is during their active growing season, typically spring or early summer, allowing them ample time to recover and establish in their new home. Avoid repotting during dormancy or stressful periods.
Pot Material Considerations
Choosing the right pot material impacts moisture retention and aeration. Terracotta pots are porous, promoting airflow and allowing the soil to dry out faster, which is excellent for plants prone to root rot. Plastic pots, on the other hand, retain moisture longer and are lighter, making them suitable for plants that prefer consistently moist soil or for larger specimens you might move around. Always select a pot that is only 1-2 inches larger in diameter than the old one. Too large a pot can lead to excess moisture retention and potential root rot.
Selecting the Right Potting Mix
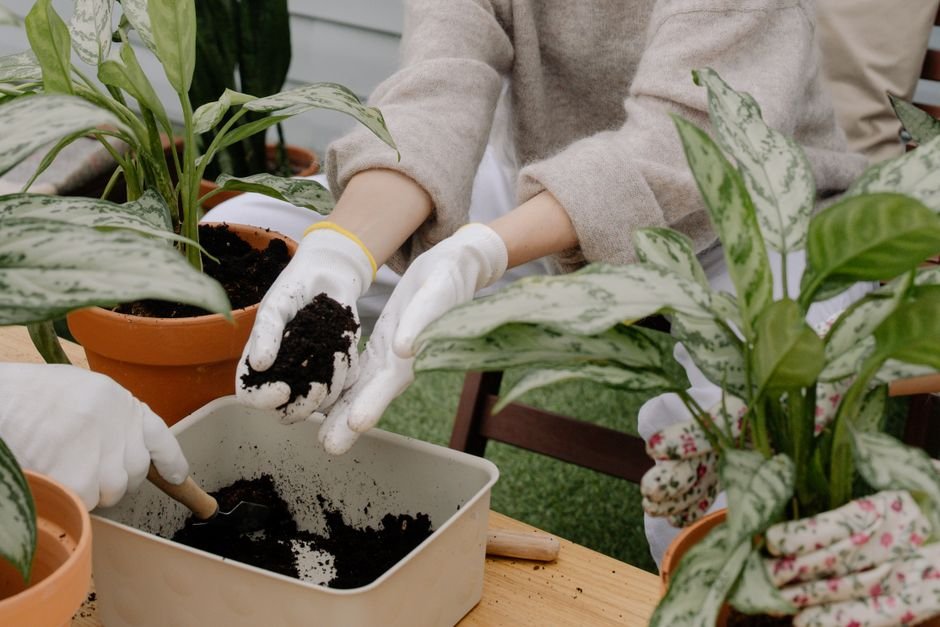
The quality of your potting mix is paramount. Avoid using garden soil, as it’s too dense for container plants. Opt for a high-quality, well-draining potting mix specifically formulated for houseplants. Brands like FoxFarm Ocean Forest or Espoma Organic Potting Mix offer excellent aeration and nutrient profiles. For plants with specific needs, such as succulents or orchids, choose specialized mixes that provide the ideal drainage and composition. Ensure you have enough fresh mix to fill the new pot and surround the root ball.
The Step-by-Step Repotting Process
With your supplies ready and your plant identified as root-bound, it’s time to get your hands dirty. Follow these steps carefully to ensure a successful repotting experience and minimize stress on your plant.
- Prepare the New Pot: Place a small amount of fresh potting mix at the bottom of your new pot. This layer should be thick enough so that when the plant is placed on top, the base of the stem is at the same level as it was in the old pot, or slightly below the rim of the new pot to allow for watering.
- Gently Remove the Plant: Lay the plant on its side and gently tap the sides of the old pot to loosen the soil. If resistant, you might need to run a knife around the inner edge. Carefully slide the plant out, supporting the base of the stem. Avoid pulling the plant by its stem.
- Inspect and Untangle Roots: Once out of the pot, observe the root ball. If it’s a solid, matted mass, gently loosen the roots with your fingers, a small fork, or a blunt stick. Work from the bottom upwards, untangling any roots that are circling tightly. This encourages them to grow outwards into the new soil.
- Prune Damaged or Circling Roots: Using clean, sharp pruning shears, trim any dead, mushy, or excessively long roots. For severely root-bound plants, you can make a few vertical cuts (about an inch deep) around the perimeter of the root ball to encourage new outward growth. Aim to remove no more than 1/4 to 1/3 of the total root mass.
- Place Plant in the New Pot: Center the plant in its new pot, ensuring it sits at the correct height. The top of the root ball should be about an inch below the rim of the pot to prevent soil and water from overflowing during irrigation.
- Add Fresh Soil: Begin filling the new pot with fresh potting mix around the root ball. Gently tamp down the soil to remove large air pockets, but avoid compacting it too densely. Ensure all roots are covered, and the plant is stable.
- Water Thoroughly: Water the plant immediately and generously until water drains from the bottom. This helps settle the soil and provides essential moisture to the roots. You might need to add a bit more soil after the first watering if it settles significantly.
Post-Repotting Care for Thriving Plants
The period immediately following repotting is critical for your plant’s recovery. It’s common for plants to experience a bit of ‘transplant shock,’ which might manifest as temporary wilting or yellowing leaves. With proper care, they’ll bounce back stronger than ever.
| Care Aspect | Guideline Post-Repotting |
|---|---|
| Light | Provide bright, indirect light for 1-2 weeks. Avoid harsh direct sunlight, which can stress a recovering plant. |
| Water | Water thoroughly immediately after repotting. Allow the top inch or two of soil to dry out before watering again. Use a moisture meter, readily available for around $15-$25 at garden centers or online, to accurately gauge soil moisture. |
| Humidity | Maintain moderate to high humidity (50-70%) to aid recovery, especially for tropical plants. A pebble tray or humidifier can be beneficial. |
| Temperature | Keep consistent room temperatures (65-75°F / 18-24°C). Avoid drafts or sudden temperature drops. |
| Fertilization | Do not fertilize for 4-6 weeks after repotting. Fresh potting mix contains enough nutrients for initial recovery. When you resume, use a balanced liquid fertilizer like Schultz Plant Food or a slow-release option. |
Monitor your plant closely for the next few weeks. If your plant is struggling with light, especially during darker US winters, a supplemental LED grow light can provide the necessary spectrum for recovery and sustained growth.
Frequently Asked Questions About Repotting Root-Bound Plants
How often should I repot my houseplants?
The frequency varies by plant type and growth rate. Fast-growing plants might need repotting annually, while slow growers might only need it every 2-3 years. Always check for signs of root-bound conditions rather than adhering strictly to a schedule.
What if I don’t have a bigger pot?
If you don’t want a larger plant or lack a bigger pot, you can ‘root prune’ your plant. Carefully remove the plant from its pot, prune about 1/4 to 1/3 of the outer root mass, and then repot it back into the same container with fresh potting mix. This rejuvenates the root system.
Can I repot my plant in winter?
While spring and summer are ideal, you can repot in winter if absolutely necessary, especially if the plant is severely root-bound and showing significant distress. Just be aware that recovery might be slower due to reduced light and cooler temperatures.
Why is my plant wilting after repotting?
Wilting after repotting is usually a sign of transplant shock. The roots have been disturbed, and the plant needs time to adjust. Ensure it’s in a stable environment with indirect light and consistent moisture (but not overwatering). Most plants recover within a week or two.
When can I fertilize my plant after repotting?
Wait at least 4-6 weeks before resuming your regular fertilization schedule. Fresh potting mix typically contains enough nutrients to sustain the plant during its initial recovery phase, and fertilizing too soon can burn sensitive, newly disturbed roots.