You see them. Those tiny, black, annoying flies flitting around your prized Monstera. You swat one, and three more seem to appear in its place. They hover around your face while you’re trying to work, they land in your morning coffee, and they turn your serene indoor jungle into a source of constant frustration. You’re dealing with fungus gnats, the uninvited guests of the houseplant world. For years, plant parents have been locked in a losing battle, armed with sticky traps, foul-smelling oils, and fizzy chemical solutions. But the war is about to end. We are on the cusp of a new era in pest management, a biological control revolution that promises not just to manage, but to completely banish fungus gnats forever. The year is 2026, and the definitive answer is here. It’s safe, it’s targeted, and it’s called Bacillus thuringiensis israelensis, or BTI.
This is not another article rehashing the same tired, temporary fixes. This is your comprehensive, deep-dive guide into the future of houseplant pest control. We’re going to dismantle the myths, explore the powerful science behind BTI, and give you a step-by-step battle plan to reclaim your home and protect your plants. Forget what you thought you knew about fungus gnat control. The revolution is here, and your gnat-free oasis awaits.
The Fungus Gnat Menace: More Than Just an Annoyance
Before we can declare victory, we must first understand our enemy. Fungus gnats (of the families Sciaridae and Mycetophilidae) are often mistaken for fruit flies, but their habits are distinctly different. While fruit flies are drawn to your kitchen’s fermenting produce, fungus gnats are obsessed with the damp, organic-rich soil of your houseplants. While the flying adults are the most visible and irritating part of the problem, they are merely a symptom. The real damage is happening below the surface, in the soil, where the life cycle of this pest truly unfolds.
Understanding the Fungus Gnat Life Cycle
The key to eradicating any pest is to break its life cycle. The fungus gnat life cycle consists of four stages, and understanding them reveals why so many common treatments fail.
- Egg (4-6 days): An adult female fungus gnat can lay up to 200 tiny, translucent eggs in the top one to two inches of moist potting soil. This is where the infestation begins.
- Larva (10-14 days): The eggs hatch into small, worm-like larvae with black heads. This is the most destructive stage. The larvae feed on fungi, algae, and decaying organic matter in the soil. Crucially, they also feed on the delicate root hairs of your plants, and sometimes even burrow into the stems of seedlings and cuttings. This damage inhibits the plant’s ability to absorb water and nutrients, leading to stunted growth, yellowing leaves, and general wilting.
- Pupa (3-6 days): After gorging themselves, the larvae enter the pupal stage within the soil, transforming into adults. This stage is non-feeding and relatively protected.
- Adult (7-10 days): The winged adult emerges from the soil with one primary mission: to mate and lay more eggs, starting the cycle all over again. The adults themselves do not harm the plants, but their sheer numbers and relentless breeding make them a formidable foe.
With a life cycle that can be completed in as little as three weeks in warm, indoor conditions, a small gnat problem can explode into a full-blown infestation in a shockingly short amount of time. One gnat becomes hundreds, and hundreds become thousands.
Why Gnats Love Your Houseplants
Your home provides a perfect, predator-free paradise for fungus gnats. They thrive on three key elements that are all too common in indoor gardening:
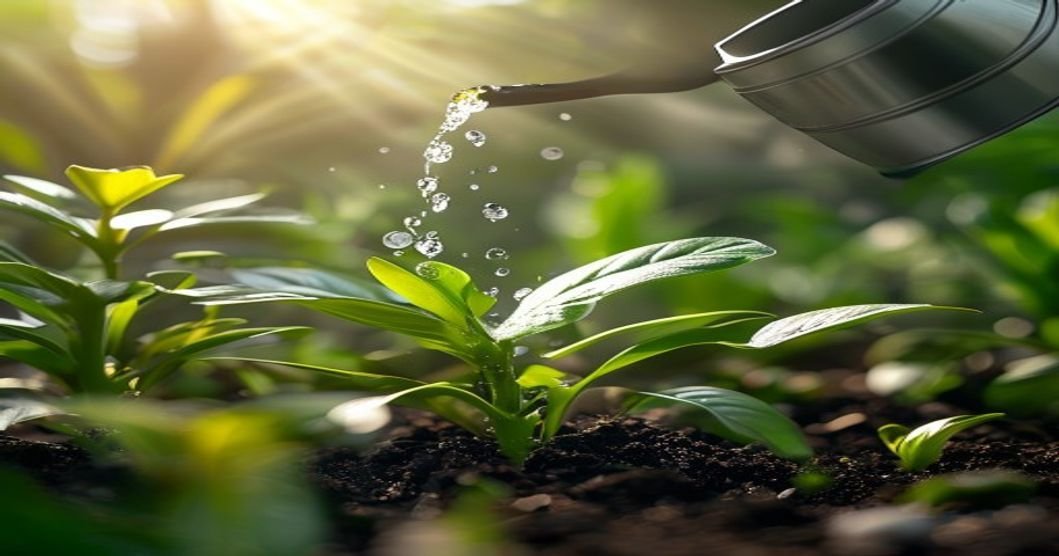
- Consistent Moisture: This is the number one attractant. Overwatering or using a potting mix that retains too much moisture creates a perpetually damp environment, which is the ideal breeding ground for the soil-borne fungi that the larvae feed on. This is why a solid watering strategy is your first line of defense.
- Organic Matter: Most high-quality potting soils are rich in organic components like peat moss, coco coir, and compost. While excellent for our plants, this is a five-star buffet for fungus gnat larvae.
- Warm Temperatures: The stable, warm temperatures inside our homes allow fungus gnats to breed year-round, unlike in the outdoors where winter would halt their life cycle.
This combination of factors means that almost every houseplant owner will face a fungus gnat problem at some point. The question isn’t if, but when—and how you’ll respond when they arrive.
The Old Guard is Failing: Why Traditional Methods Fall Short
For decades, the internet and garden centers have peddled a handful of “solutions” for fungus gnats. You’ve probably tried them. A splash of hydrogen peroxide, a drench of neem oil, or maybe even letting the soil dry out completely. While these methods can sometimes provide temporary relief, they fail to address the root cause of the infestation and often come with their own set of risks. They are bandaids on a bullet wound, and it’s time to understand why they are being left behind in the 2026 pest control landscape.
The Neem Oil Myth: A Surface-Level Solution
Neem oil is often hailed as a panacea for plant pests, but its effectiveness against fungus gnats is wildly overstated. Neem oil works primarily as a repellent and a contact insecticide. When you spray it on the foliage or drench the soil, it can kill or deter the adult gnats it directly touches. However, it has very little effect on the hundreds of larvae living safely below the soil surface.
Furthermore, a heavy soil drench with an oil-based product can coat the soil particles, reducing aeration and potentially trapping too much moisture. This can create an anaerobic environment, which is a prime cause of a much more serious issue: root rot. You might kill a few adult gnats, but in the process, you could be creating an even better breeding ground for the next generation and suffocating your plant’s roots. It’s an ineffective and risky strategy.
The Hydrogen Peroxide Gamble: A Risky Quick Fix
The “hydrogen peroxide drench” is another popular internet hack. The theory is that when a solution of hydrogen peroxide and water is poured into the soil, the fizzing action and release of an extra oxygen molecule will kill the larvae on contact. And to some extent, it can work. You’ll likely see a reduction in gnats for a few days.
However, this is a scorched-earth approach. The chemical reaction that kills the gnat larvae is non-selective. It also kills beneficial microbes and bacteria living in the soil that contribute to a healthy root ecosystem. More importantly, hydrogen peroxide can damage the fine, delicate root hairs of your plant. Repeated applications can lead to chemical “burn” on the roots, stressing the plant and making it more susceptible to other diseases. If your plant is already struggling, a peroxide drench can be the final nail in the coffin. It’s a temporary fix with the potential for permanent damage.
The 2026 Biological Revolution: Enter BTI (Bacillus thuringiensis israelensis)
This is where the game changes. Forget the harsh chemicals and ineffective oils. The future of fungus gnat control is biological, targeted, and incredibly effective. It’s a naturally occurring soil bacterium called Bacillus thuringiensis subspecies israelensis, or BTI for short. This is not a new discovery, but its application and understanding in the houseplant community are spearheading a revolution in how we manage our indoor ecosystems.
What is BTI? The Science Explained Simply
BTI is a microbe found naturally in soil and aquatic environments all over the world. It was discovered in the Israeli desert in 1976. During its sporulation phase, this bacterium produces unique protein crystals that are harmless to almost every living thing on the planet. However, these proteins are highly and specifically toxic to the larvae of only a few insect groups, most notably mosquitoes, black flies, and our nemesis, the fungus gnat.
Think of it as a lock and key system. The digestive tract of a fungus gnat larva has a very specific alkaline pH and unique enzymes that act as the “lock.” The BTI protein crystal is the “key.” When the larva ingests the BTI, its digestive system “unlocks” the protein’s toxic potential. For humans, pets, birds, fish, and even beneficial insects like bees and ladybugs, this lock simply doesn’t exist. Their digestive systems cannot activate the protein, so it passes through harmlessly.
How BTI Works: A Targeted Attack on Larvae
The process is a masterpiece of natural engineering:
- Application: You introduce BTI into the soil, typically by watering it in.
- Ingestion: The fungus gnat larvae, feeding on organic matter in the soil, ingest the BTI spores and their associated protein crystals.
- Activation: Inside the larva’s alkaline gut, the protein crystals dissolve and release a potent toxin (a delta-endotoxin).
- Paralysis: This toxin binds to specific receptors on the gut wall, effectively punching holes in it. This paralyzes the larva’s digestive system, and it stops feeding within hours.
- Elimination: The gut wall breaks down, and the BTI spores and normal gut bacteria spill into the larva’s body cavity, causing a lethal infection. The larva dies within 24-48 hours.
The beauty of this system is its surgical precision. It targets only the larvae, breaking the life cycle at its most critical point. The adults will live out their short lives and die off without being able to produce a new generation. Within a few weeks, the entire gnat population collapses.
Why BTI is the Gold Standard for Fungus Gnat Control
- It’s Highly Specific: BTI is not a broad-spectrum pesticide. It is harmless to humans, pets (cats, dogs), birds, fish, beneficial insects, and the plants themselves. You can use it with complete peace of mind.
- It’s Incredibly Effective: It doesn’t just deter; it eliminates the larval population, which is the source of the infestation.
- No Resistance: Unlike chemical pesticides, insects have not developed a significant resistance to the BTI toxin because of its complex mode of action.
- It’s Environmentally Safe: BTI breaks down quickly in the environment and does not pollute waterways or harm wildlife. It is approved for use in organic farming and even for treating drinking water reservoirs for mosquito control.
Your Ultimate Weapon: How to Use BTI with Mosquito Dunks
So, how do you get this miracle microbe into your plant pots? The most common and cost-effective way for houseplant enthusiasts is by using products designed for mosquito control, such as “Mosquito Dunks” or “Mosquito Bits.” These are small, donut-shaped pucks or granular bits made of compressed BTI and a carrier agent. While marketed for ponds and birdbaths, they are our secret weapon for fungus gnats.
Step-by-Step Guide: Creating Your Own BTI “Tea”
The most effective method is to create a “BTI tea” to water your plants with. This ensures the BTI is evenly distributed throughout the soil where the larvae live. Applying the dry bits directly to the soil can be less effective and can sometimes lead to mold growth on the carrier material itself.
- Gather Your Supplies: You’ll need a watering can or a large jar/bucket, water, and Mosquito Dunks or Mosquito Bits.
- Determine Your Dosage: A good starting ratio is to use one-quarter of a Mosquito Dunk or one tablespoon of Mosquito Bits per gallon of water. You can’t really “overdose” with BTI, so don’t stress about being perfectly precise.
- Steep the BTI: Break up the piece of the dunk and drop it, or sprinkle the bits, into your container of water. Let it steep for at least 4-6 hours. For maximum potency, let it sit overnight (24 hours is ideal). The BTI bacteria will be released and suspended in the water.
- Strain (Optional but Recommended): To prevent the solid carrier material from clogging your watering can or sitting on top of your soil, you can strain the water through a cheesecloth, fine mesh sieve, or even an old nylon stocking. The BTI itself is microscopic and will remain in the water.
- Store and Use: Your BTI tea is now ready. The treated water can be stored for up to a week, but it’s most potent when used within 48-72 hours. You can leave the dunk piece in your watering can and simply refill it with water as needed. A single dunk can treat water for months.
Application and Watering Schedule for Maximum Impact
To completely banish fungus gnats forever, consistency is key. You need to break every overlapping life cycle.
Use your BTI-treated water for every single watering for at least 4-6 weeks. This is non-negotiable. Every time your plants need a drink, use the BTI tea. This ensures that as new eggs hatch, the larvae are immediately exposed to the BTI and eliminated before they can mature. After the initial 4-6 week period, you can reduce the frequency to once a month as a preventative measure. This proactive approach is the core of the 2026 pest control mindset—prevention over reaction.
Is BTI Safe for All Plants, Pets, and People?
Yes, unequivocally. Decades of research and use by public health agencies worldwide have confirmed its remarkable safety profile. It is OMRI (Organic Materials Review Institute) listed for organic production. It will not harm your most delicate Calathea, your curious cat, or your toddler. It is one of the safest and most responsible pest control solutions available today. If you’re ever unsure about a plant issue, whether it’s pests or something else, our AI Disease Finder tool can provide quick insights to help you diagnose the problem accurately.
Mastering Your Environment: The Foundation of Gnat-Free Living
BTI is the ultimate weapon, but the best war is one that’s never fought. Creating an environment that is inhospitable to fungus gnats is the foundation of long-term success. This means focusing on the one thing they need most: soil moisture.
The Soil Moisture Connection: Breaking the Breeding Cycle
Fungus gnat larvae cannot survive in dry soil. Their primary food source, fungus, also cannot thrive without moisture. By allowing the top one to two inches of your potting soil to dry out completely between waterings, you create a “death zone” for their eggs and young larvae. This is the single most important cultural practice for preventing fungus gnats. Get a feel for the weight of your pots when they are wet versus dry, or simply use your finger to test the soil. Don’t water on a schedule; water when the plant actually needs it.
Capillary Action and Bottom Watering: Your Secret Ally
A brilliant strategy to keep the topsoil dry while ensuring your plant gets the water it needs is bottom watering. This technique leverages the principle of capillary action.
- Place your plant pot (which must have drainage holes) in a tray, saucer, or sink filled with a few inches of water (use your BTI tea here!).
- Allow the plant to sit for 15-30 minutes. The soil and roots will draw water up from the bottom, hydrating the root ball without ever saturating the top layer of soil.
- Once the top of the soil feels slightly damp to the touch, remove the pot from the water and let any excess drain away.
This method not only disrupts the gnat breeding ground but also encourages deeper, stronger root growth. For a complete guide on this and other watering techniques, check out our deep dive on proper plant watering.
Choosing the Right Potting Mix
Your choice of potting medium plays a huge role. Heavy, dense soils that retain a lot of water, like Miracle-Gro straight from the bag, can be a gnat magnet. Instead, opt for well-aerating, fast-draining mixes. Amend your standard potting soil with generous amounts of perlite, pumice, or orchid bark. This creates more air pockets, allowing the soil to dry out more quickly and evenly. For plants that are particularly sensitive to wet conditions, like succulents and snake plants, using a specialty cactus/succulent mix is essential.
Proper lighting also contributes. Plants receiving adequate light will photosynthesize more actively and use water more quickly, helping the soil dry out. If your space is dim, consider supplementing with grow lights to keep your plants healthy and your soil less hospitable to pests.
A Multi-Pronged Attack: Complementary Gnat Control Strategies
BTI is the star player, a powerful offensive force against the larvae. But a truly comprehensive strategy also includes a strong defense to deal with the flying adults and adds another layer of protection. Combining BTI with these methods will accelerate your path to a gnat-free home.
🌱 Top Recommended Plant Gear
Ensure your plants never dry out. We highly recommend the LECHUZA Self Watering Plant Pot CLASSICO for ultimate moisture control and professional aesthetic.
The Unsung Hero: Yellow Sticky Traps for Adult Gnats
While BTI works on the larvae, you still have to deal with the current generation of flying adults. Yellow sticky traps are a simple, non-toxic, and incredibly effective tool for this. Fungus gnats are attracted to the color yellow. Placing these sticky stakes in the soil of your pots will capture a significant number of adults, reducing the population and, more importantly, preventing them from laying new eggs. They also serve as an excellent monitoring tool. As you see fewer and fewer gnats on the traps, you’ll know your BTI treatment is working.
Unleashing the Micro-Warriors: Beneficial Nematodes
If you want to bring in another biological powerhouse, look no further than beneficial nematodes, specifically the species Steinernema feltiae. These are microscopic, unsegmented roundworms that are natural predators of soil-dwelling pests. They are completely safe for plants, pets, and people.
You purchase them live (usually in a refrigerated pouch) and mix them with water. You then drench the soil of your plants. The nematodes actively hunt through the soil, find fungus gnat larvae, enter their bodies, and release a symbiotic bacterium that kills the host within a day or two. They are a fantastic complement to BTI, offering a seek-and-destroy mechanism that ensures no larva is safe.
Physical Barriers: Sand, Gravel, and Systemic Granules
Another strategy is to create a physical barrier over the top of your soil. A half-inch layer of coarse sand or fine decorative gravel can help. The idea is that this layer dries out very quickly, creating a harsh, dry barrier that deters adult gnats from laying their eggs in the moist soil below. This can be effective, but it may alter the moisture retention of your pot, so you’ll need to adjust your watering routine accordingly.
For severe infestations in non-edible plants, systemic insecticide granules can be used. These are absorbed by the roots and spread throughout the plant’s tissues. When larvae feed on the roots, they ingest the insecticide and die. This is a chemical approach and should be considered a last resort, as BTI and nematodes are far safer and more environmentally friendly options.
Conclusion: Embrace the Future and Banish Fungus Gnats Forever
The days of feeling helpless against the endless swarm of fungus gnats are over. The frustration of using ineffective, risky home remedies is a thing of the past. The 2026 biological control revolution is about working smarter, not harder. It’s about leveraging the power of nature to solve a natural problem with precision and safety.
By embracing Bacillus thuringiensis israelensis (BTI) as your primary weapon, you are not just treating the symptoms—you are eliminating the source. By combining this powerful larvicide with smart environmental controls like proper watering and the use of sticky traps, you create an integrated pest management system that is not only effective but sustainable. You are taking back control of your indoor garden and ensuring the health and beauty of your plants for years to come.
So, brew your BTI tea, set your yellow traps, and adopt a mindful watering routine. It’s time to move beyond the temporary fixes and myths of the past. It’s time to join the revolution, and finally, truly, banish fungus gnats forever.
The 2026 Comprehensive Masterclass: Botanical Deep Dive
To truly understand the nuances of the concepts discussed above, we must transition from basic houseplant care to advanced botanical mechanics. Elite plant collectors do not rely on guesswork; they rely on environmental control, photobiology, and soil chemistry. In this masterclass section, we will systematically unpack the advanced science necessary to maintain a hyper-optimized indoor jungle.
Part 1: The Physics of Lighting and Photobiology
Lighting is the fundamental engine of biological growth. Without adequate Daily Light Integral (DLI) and Photosynthetic Photon Flux Density (PPFD), any adjustments made to watering or fertilizing are entirely useless. When you place a plant in a corner, you are not just dimming its environment; you are actively starving it.
Understanding PAR and PPFD
Photosynthetically Active Radiation (PAR) designates the spectral range (wave band) of solar radiation from 400 to 700 nanometers that photosynthetic organisms are able to use in the process of photosynthesis. PPFD measures the amount of PAR that actually arrives at the plant. It is measured in micromoles per square meter per second (μmol/m²/s).
- Low-Light Plants (e.g., Snake Plants, ZZ Plants): Require a PPFD of 20 to 50 μmol/m²/s. While they survive here, they will rarely trigger massive new growth.
- Medium-Light Plants (e.g., Calatheas, Philodendrons): Require a PPFD of 50 to 150 μmol/m²/s. At this range, they begin to express deeper variegation colors and stronger petiole rigidity.
- High-Light Plants (e.g., Monsteras, Ficus, Cacti): Require a baseline of 200 to 400+ μmol/m²/s to exhibit maximum fenestration (leaf holes) and secondary branching.
Part 2: Soil Chemistry, CEC, and Hydrophobicity
Your potting mix is not just a physical anchor for your plant; it is a bio-active chemical reactor. The most critical metric in any soil mix is its Cation Exchange Capacity (CEC).
Cation Exchange Capacity Explained
CEC is the measure of a soil’s ability to hold and release various elements and compounds through electrical charges. Highly organic materials like Peat Moss and Coco Coir have a very high CEC, meaning they grab onto fertilizer molecules (like Nitrates and Phosphates) and hold them so the roots can slowly feed over time. This is why placing a plant purely in gravel (which has a CEC of nearly zero) requires constant, daily nutrient flushing (hydroponics).
The Hydrophobic Death Trap
When high-CEC soils, particularly peat moss, dry out entirely, they undergo a mechanical failure known as hydrophobicity. The organic fibers shrink and lock tightly together. When water is introduced, the surface tension is too high to penetrate the locked fibers. The water channels directly down the sides of the pot. To break the hydrophobic barrier, you must use a surfactant (like a mild dish soap solution) or submerge the pot entirely for 45 minutes to force capillary hydration upward against gravity.
Part 3: Advanced Hydration Dynamics (Capillary Action)
Water does not simply flow downward. In the micro-environment of a plant pot, capillary action often overcomes gravity.
The Perched Water Table (PWT): No matter how much drainage you place at the bottom of a container, the lowest contiguous section of soil will always remain identically saturated. This is physics. If you put 3 inches of rocks at the bottom of a pot, you do not improve drainage; you merely push the soggy PWT three inches higher into the root mass, radically increasing the risk of Pythium (root rot). This is why nursery pots with numerous drainage holes placed directly on a porous surface are the only empirically sound container choice.
Part 4: The Pathogen War (Fungal vs Bacterial)
When a plant fails, the visual symptom (yellowing, dropping leaves) is merely the final stage of a prolonged microscopic war.
Anaerobic Pathogens
When a soil is over-hydrated, oxygen molecules are physically displaced by water molecules. Roots require oxygen to respire. As roots suffocate, the cells burst and die. This dead tissue becomes an immediate food source for anaerobic bacteria—bacteria that thrive strictly in zero-oxygen environments. The bacteria consume the dead roots, creating a sulfurous, rotting odor. To combat this, elite growers use Hydrogen Peroxide (H2O2) drenches. The extra, highly unstable oxygen atom in H2O2 detonates on contact, forcefully oxidating the anaerobic bacteria and re-oxygenating the root zone.
Part 5: Comprehensive Houseplant Glossary of Terms
To ensure absolute clarity for our readers, we have compiled an exhaustive glossary of the terms heavily utilized within the professional botanical sphere:
- Aroid: A common name for plants in the Araceae family, characterized by a spathe and spadix inflorescence (e.g., Philodendrons, Monsteras).
- Chlorosis: The yellowing of leaf tissue due to a lack of chlorophyll, often caused by nutrient deficiencies or root suffocation.
- Etiolation: The stretching and weakening of stems as a plant aggressively reaches toward a distant light source.
- Fenestration: The natural occurrence of holes or deep splits in the leaves of mature plants, designed to allow wind and light to pass through to the lower canopy.
- Node: The vital junction on a stem where leaves, aerial roots, and new growth points (eyes) emerge. A cutting without a node will never grow a new plant.
- Variegation: A genetic (chimeric) or viral mutation resulting in distinct zones of differently colored tissue (typically white or yellow) due to an absence of chlorophyll in those areas.
- Transpiration: The biological process by which a plant absorbs water through its roots and subsequently releases it as vapor through micro-pores (stomata) on its leaves.
Conclusion: The 2026 Shift in Plant Ownership
The era of buying a plant and hoping for the best is over. Modern houseplant ownership requires a foundational understanding of physics, chemistry, and biology. By tracking your PPFD, balancing your soil’s CEC, and actively managing the Perched Water Table, you ensure your indoor jungle moves from simple survival to massive, aggressive growth.
Frequently Asked Questions
What are the best conditions for this plant?
Most houseplants thrive in bright, indirect light with temperatures between 65-80F (18-27C). Ensure good drainage and water when the top inch of soil feels dry.
How often should I water?
Watering frequency depends on the plant species, pot size, and environment. A general rule is to check the soil moisture before watering. Overwatering is the most common cause of houseplant death.
What soil mix works best?
A well-draining mix of peat moss, perlite, and orchid bark works well for most tropical houseplants. Succulents prefer a grittier mix with more sand and perlite.
Quick Care Reference
| Factor | Requirement | Notes |
|---|---|---|
| Light | Bright indirect | Avoid direct afternoon sun |
| Water | When top inch dry | Reduce in winter |
| Humidity | 50-70% | Mist or use pebble tray |
| Temperature | 65-80F (18-27C) | Avoid cold drafts |
| Soil | Well-draining mix | Peat, perlite, bark |
| Fertilizer | Monthly (spring-summer) | Half-strength balanced |