
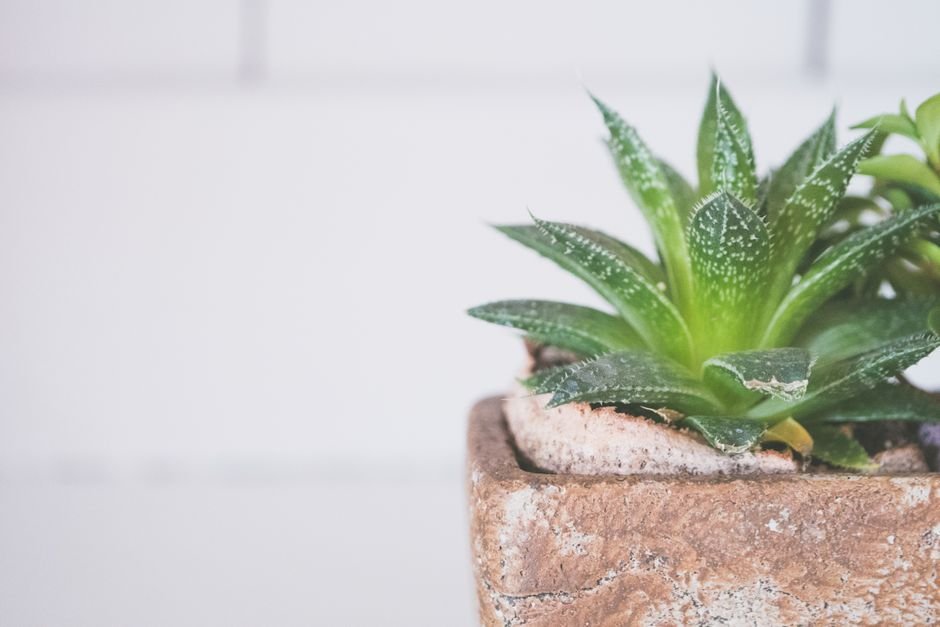

Welcome, fellow plant enthusiasts, to PlantsMag.com! As a senior horticulturist, I’m thrilled to guide you through the world of Aloe Vera. This remarkable succulent, scientifically known as Aloe barbadensis Miller, is more than just a pretty face; it’s a powerhouse of beneficial properties. Understanding proper Aloe Vera care and uses is crucial for every American homeowner looking to cultivate this versatile plant successfully and harness its renowned capabilities. From soothing sunburns to adding a touch of green to your decor, Aloe Vera is an indispensable addition to any plant collection.
Understanding Aloe Vera: A Succulent Staple
Native to the Arabian Peninsula, Aloe Vera has journeyed across continents to become a beloved houseplant in homes across the United States. Its thick, fleshy, spear-like leaves, often edged with small teeth, store a clear, mucilaginous gel that has been used for centuries in traditional medicine and skincare. This resilient succulent is not only low-maintenance but also offers a myriad of health and wellness benefits, making it a perfect choice for both novice and experienced plant parents alike. Recognizing its basic characteristics is the first step toward successful cultivation.
Optimal Growing Conditions for Thriving Aloe
Ensuring your Aloe Vera thrives starts with mimicking its natural desert-like habitat. Providing the right environment will lead to a robust, healthy plant ready to offer its many benefits. Pay close attention to light, water, temperature, and humidity for optimal growth.
Lighting Requirements
Aloe Vera plants crave bright, indirect sunlight. A south or west-facing window is ideal, where it can receive several hours of bright light without the harsh intensity of direct afternoon sun, which can scorch its leaves. If natural light is scarce, especially during darker winter months or in northern US states, consider supplementing with a full-spectrum grow light. Products like the GE BR30 LED Grow Light can provide the necessary lumens to keep your Aloe vibrant and prevent it from stretching or becoming leggy.
Watering Wisely
Overwatering is the quickest way to kill an Aloe Vera. As a succulent, it stores water in its leaves, making it highly drought-tolerant. The ‘soak and dry’ method is best: water thoroughly until it drains from the bottom, then allow the soil to dry out completely before watering again. This might mean watering every 2-4 weeks in summer and even less frequently in winter. A reliable moisture meter, such as the XLUX T10 Soil Moisture Meter, can be an invaluable tool, helping you accurately gauge soil dryness and prevent root rot.
Potting, Soil, and Repotting Best Practices
The right foundation is key for Aloe Vera. Proper potting and soil choices are critical for drainage and root health. When your plant outgrows its home, knowing how to repot it correctly will ensure continued vitality.
Choose terracotta or unglazed ceramic pots with drainage holes; these materials promote airflow and help evaporate excess moisture, unlike plastic pots which retain too much water. For soil, a well-draining cactus or succulent mix is paramount. Brands like Espoma Organic Cactus Mix or Black Gold Cactus Mix are excellent choices, often pre-formulated with perlite or coarse sand to enhance drainage. You can also create your own by mixing regular potting soil with equal parts perlite or coarse sand.
Repot your Aloe Vera every 1-2 years, or when it becomes root-bound or produces numerous ‘pups’ (offsets). Spring is the best time for repotting. Gently remove the plant, clean off old soil, and place it in a pot only slightly larger than the previous one (about 1-2 inches wider). This is also an ideal time to carefully separate pups, giving them their own pots to grow into new plants.
Common Pests, Diseases, and Troubleshooting
Even resilient Aloe Vera can encounter issues. Vigilance and timely intervention are crucial to keeping your plant healthy and free from common ailments.
The most prevalent issue is root rot, almost always caused by overwatering. Symptoms include mushy, yellowing leaves and a soft base. Prevention is key: ensure good drainage and proper watering. If caught early, you might be able to save the plant by repotting into fresh, dry soil after trimming away any rotted roots. Pests like mealybugs can occasionally appear, usually in the crevices of the leaves. Treat them by dabbing with a cotton swab dipped in rubbing alcohol, or use an insecticidal soap specifically formulated for houseplants.
Other common problems include:
- Yellowing or Browning Leaves: Often a sign of too much direct sun or overwatering.
- Brown Tips: Usually indicates underwatering or low humidity.
- Leggy Growth: The plant stretching towards a light source, signifying insufficient light. Relocate to a brighter spot or use a grow light.
Harnessing the Power of Aloe Vera: Practical Uses
Beyond its ornamental appeal, the true magic of Aloe Vera lies in its potent gel, renowned for its soothing and healing properties. Safely harvesting and applying this natural remedy can provide relief for various common ailments.
The clear gel found within the leaves of Aloe barbadensis Miller is packed with vitamins, enzymes, minerals, and amino acids. It’s most famous for its application on minor burns, particularly sunburns, where it provides a cooling sensation and aids in skin regeneration. It can also be used to soothe skin irritations, minor cuts, insect bites, and dry skin. For those interested in internal uses, consult a healthcare professional before ingesting, as not all Aloe Vera products are safe for consumption.
Harvesting and Applying Aloe Vera Gel:
- Choose a mature, lower leaf from your plant. Look for one that is thick and plump.
- Using a clean, sharp knife, carefully cut the leaf close to the base of the plant.
- Immediately place the cut end downwards in a cup for 10-15 minutes. This allows the yellow latex (aloin), a bitter compound that can be a skin irritant and laxative, to drain out.
- After draining, wash the leaf thoroughly.
- Carefully trim off the thorny edges of the leaf.
- Lay the leaf flat and slice it open lengthwise.
- Using a spoon, gently scoop out the clear gel.
- Apply the fresh gel directly to the affected skin area. Store any excess gel in an airtight container in the refrigerator for up to a week.
Aloe Vera Care Requirements Comparison Table
| Requirement | Ideal Conditions for Aloe Vera |
|---|---|
| Light | Bright, indirect sunlight (south/west window) |
| Water | Thoroughly when soil is completely dry (every 2-4 weeks, less in winter) |
| Humidity | Low to moderate (average household humidity is fine) |
| Soil | Fast-draining cactus/succulent mix (e.g., Espoma, Black Gold) |
| Temperature | 65-80°F (18-27°C) – Protect from frost (USDA Zones 9-11 outdoors) |
Frequently Asked Questions About Aloe Vera Care and Uses
Can I keep Aloe Vera outdoors in the US?
Yes, in USDA Hardiness Zones 9-11, Aloe Vera can thrive outdoors year-round. In cooler zones, it’s best to grow it in a pot and bring it indoors before the first frost, usually when nighttime temperatures consistently drop below 50°F (10°C).
How do I get my Aloe Vera to produce ‘pups’?
Healthy, mature Aloe Vera plants naturally produce ‘pups’ or offsets. Ensure your plant receives adequate light, water, and nutrients. When repotting, separating these pups can encourage the mother plant to produce more. A balanced, diluted liquid succulent fertilizer like Schultz Cactus Plus Liquid Plant Food (diluted to half strength) can also encourage growth.
Is Aloe Vera safe for pets?
No, the latex (yellow sap) found in Aloe Vera leaves contains aloin, which can be toxic to pets if ingested, causing symptoms like vomiting, diarrhea, and lethargy. Keep Aloe Vera plants out of reach of curious cats and dogs.
My Aloe Vera leaves are thin and curled. What’s wrong?
Thin, curled, or shriveled leaves are a classic sign of underwatering. Your plant is using its stored water, and its leaves are dehydrating. Give it a thorough watering until water drains from the bottom of the pot, and ensure the soil is drying out completely between waterings, but not staying dry for excessively long periods.
How often should I fertilize my Aloe Vera?
Aloe Vera plants are not heavy feeders. Fertilize sparingly, if at all, typically once or twice during the growing season (spring and summer). Use a balanced, water-soluble fertilizer specifically formulated for succulents or houseplants, diluted to half strength. Avoid fertilizing in fall and winter when the plant is dormant.
With its striking appearance and remarkable properties, Aloe Vera truly stands out as a must-have plant for every American home. By following these expert Aloe Vera care and uses guidelines, you’ll not only cultivate a beautiful, thriving succulent but also gain access to a natural remedy right at your fingertips. Embrace the joy of growing Aloe Vera – a plant that truly gives back!
Expert Aloe Vera Cultivation Insights
Beyond the basics, true mastery of Aloe Vera care involves nuanced understanding and proactive strategies. Here are some advanced tips from seasoned botanists, focusing on optimal growth and application for American homes:
Pro Tip 1: The Subtlety of Soil Substrate and Potting Material for Root Health
While excellent drainage is paramount, the ideal Aloe Vera soil isn’t just gritty; it’s also about thermal regulation and nutrient availability. Incorporate a significant percentage (50-60%) of inorganic material like pumice, coarse perlite, or horticultural grit to ensure superior aeration and prevent compaction. Crucially, blend in a small fraction (around 5-10%) of well-aged compost or worm castings. This provides a slow release of essential micronutrients that are often lacking in purely inorganic mixes, supporting robust leaf and root development without retaining excessive moisture. Furthermore, always opt for unglazed terracotta pots. Their porous nature allows for superior root aeration and evaporative cooling, which is vital for preventing root rot and stabilizing soil temperatures, mimicking the natural rocky, well-drained environments where Aloe thrives.
Pro Tip 2: Strategic Harvesting for Maximum Potency and Plant Longevity
To maximize the medicinal potency of Aloe gel and ensure the long-term health of your plant, harvest outer, mature leaves that are at least 6-8 inches long and appear plump and firm. These leaves have had ample time to develop a higher concentration of beneficial polysaccharides and other active compounds. When harvesting, use a sharp, sterile knife to make a precise, clean cut as close to the main stem as possible, ensuring not to tear the leaf or damage the central meristem. Never harvest more than 2-3 leaves at a time from a mature plant (generally, no more than 1/3 of the plant’s total leaves) and allow several weeks for recovery before the next harvest. This method encourages the plant to direct energy towards new growth and prevents undue stress, maintaining its vitality and productive capacity.
Pro Tip 3: Mastering Seasonal Acclimation and Indoor Environmental Control
For Aloes kept indoors in diverse American climates, understanding their semi-dormant cycle and light requirements is key. During cooler months (fall and winter), when temperatures drop and daylight hours significantly shorten, reduce watering frequency drastically—often to once every 4-6 weeks, or when the soil is completely dry to the touch for an extended period. Overwatering during this dormant phase is the leading cause of root rot. Conversely, when transitioning an indoor Aloe outdoors for the summer (if desired), gradual light acclimation is critical. Start by placing the plant in a fully shaded outdoor spot for a week, then move it to partial shade for another week, and finally to its desired location with bright, indirect light. Sudden exposure to intense direct sunlight can cause severe sunburn, manifested as reddish-brown patches or a complete browning of the leaves, which can take weeks to recover from.
Frequently Asked Questions About Aloe Vera
- How do I successfully propagate Aloe Vera from pups or leaf cuttings, ensuring high success rates?
Propagating Aloe Vera is most reliably successful via ‘pups’ (offsets). Carefully separate pups that are at least 2-4 inches tall and have developed their own small root system. Use a clean, sharp knife to make a precise cut, minimizing damage to both the mother plant and the pup. After separation, allow the pup’s cut end to callus for 2-3 days in a dry, shaded area to prevent fungal infections and rot upon planting. Plant it in a small pot with a well-draining cactus/succulent mix, ensuring the root ball is just covered. Water sparingly only after a week or so, and then continue with infrequent watering until established. Leaf propagation is less reliable but possible: cut a healthy, mature leaf at its base, allow it to callus for 1-2 weeks until the cut end is dry and firm. Then, lay it on top of or slightly insert the callused end into moist, sandy soil. Keep the soil barely damp and be patient; roots and new plantlets can take several months to form, and success rates are lower than with pups.
- My Aloe Vera plant is displaying signs of distress (browning, yellowing, or mushiness). What are the common causes and precise remedies?
These symptoms typically indicate environmental stress or improper care. Brown/Reddish Leaves: Often a sign of too much direct sunlight (sunburn), causing the plant to produce protective pigments. Move the plant to a location with bright, indirect light. It can also indicate cold stress if temperatures drop below 40°F (4°C). Yellow Leaves: Commonly points to overwatering, which leads to root rot. Check the soil moisture; if it’s soggy, immediately unpot the plant. Inspect roots, trim away any black, mushy, or foul-smelling sections with a sterile knife, allow the roots to air dry for a day, then repot into fresh, dry, well-draining soil. Less commonly, it could be a nutrient deficiency, addressable with a very dilute succulent fertilizer. Mushy/Translucent Leaves: This is almost always a severe case of overwatering and advanced root rot. Immediate and aggressive action is needed: unpot the plant, cut away all soft, mushy, or black roots and stem tissue until only firm, healthy tissue remains. Allow the healthy remaining plant to callus for several days (up to a week for severe cases) before repotting in completely dry, fresh succulent mix. Do not water for at least a week or two after repotting to encourage new root growth in search of moisture.
- What is the most effective method for harvesting and preserving fresh Aloe Vera gel for long-term topical applications at home?
For optimal gel quality, select a thick, mature outer leaf from a healthy plant, ideally one that’s at least two years old. Wash the leaf thoroughly to remove any dirt. With a sharp, sterile knife, carefully cut the leaf from the plant close to the main stem. Immediately place the cut end down in a glass for 10-15 minutes to allow the yellow aloin latex (which can be a skin irritant and laxative) to drain out. After draining, lay the leaf flat and trim off the serrated edges. Carefully fillet the green skin from one side using a knife, then use a spoon to scoop the clear gel out, or carefully fillet the other side of the skin to extract the gel slab. Mash or blend the gel into a smooth consistency to break down any fibrous parts. For preservation, store the fresh gel in an airtight container in the refrigerator for up to 1-2 weeks. For longer-term storage (several months), portion the gel into ice cube trays and freeze. Frozen cubes are excellent for single-use applications and maintain potency effectively.