
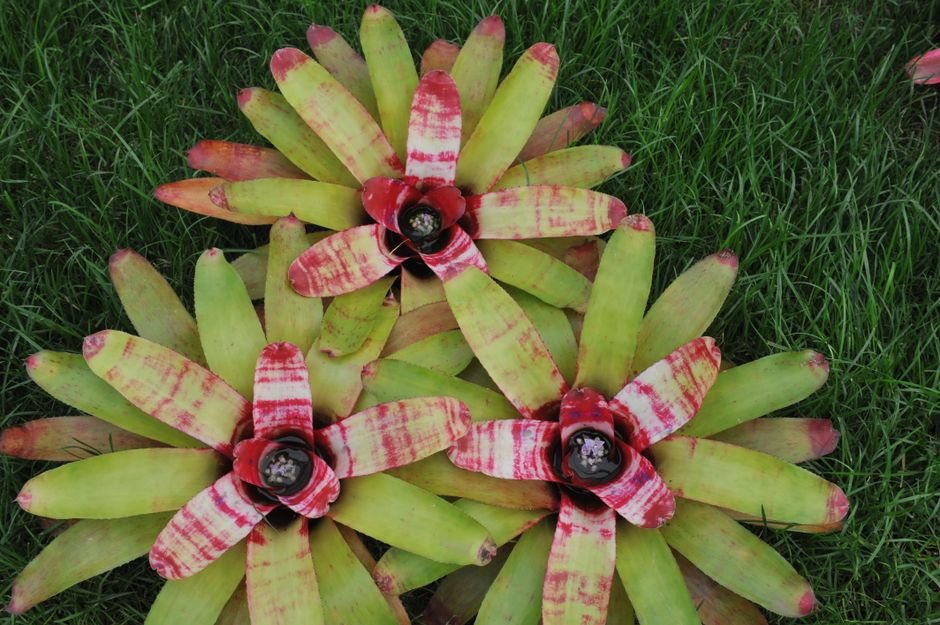

Welcome, fellow plant enthusiasts! As a senior horticulturist at PlantsMag.com, I’m thrilled to share an expert-level Bromeliad Care Guide designed to demystify these truly spectacular plants. Bromeliads, with their striking foliage and vibrant, long-lasting blooms, bring a touch of the tropics into any home. Often perceived as high-maintenance, these exotic beauties are, in fact, incredibly forgiving and surprisingly easy to care for once you understand their unique needs. Let’s dive into mastering bromeliad cultivation for stunning results.
Understanding Bromeliads: A Unique Plant Family
Bromeliads are a diverse plant family (Bromeliaceae) native to tropical and subtropical Americas. Most are epiphytes, meaning they naturally grow on trees or rocks, absorbing moisture and nutrients primarily through their leaves and a central ‘cup’ or ‘tank’ formed by their tightly overlapping leaves. While some are terrestrial, growing in soil, the epiphytic varieties like Guzmania, Vriesea, Aechmea, and Neoregelia are most commonly found in US homes. Their roots primarily serve as anchors, not for significant nutrient uptake. This unique biology is key to understanding their care, making them surprisingly adaptable to indoor environments across various USDA hardiness zones.
Light Requirements for Optimal Growth
Bromeliads thrive in bright, indirect light. Think of their native habitat: dappled sunlight filtering through a tree canopy. Direct, harsh afternoon sun can scorch their leaves, leading to bleached or browned patches. Conversely, too little light will result in duller foliage, stretched growth, and a reluctance to bloom. An east-facing window is often ideal, providing gentle morning sun, while a few feet back from a south or west-facing window can also work well. Observe your plant; if the colors are fading or the leaves look pale, it might need more light. If they’re browning or looking ‘sunburned,’ move it to a shadier spot.
Assessing Light Levels & Supplemental Solutions
Not all homes offer perfect natural light. You can assess your light levels with a simple light meter or even a smartphone app. If natural light is insufficient, especially during darker winter months, consider supplemental lighting. A full-spectrum LED grow light, costing anywhere from $20-$100 depending on size and features (e.g., Sansi 15W LED Grow Light, typically around $25), positioned 1-2 feet above your bromeliad for 10-12 hours a day, can provide the necessary intensity for vibrant color and robust growth.
Watering Wisdom: Keeping Your Bromeliad Hydrated
This is where bromeliads differ significantly from many other houseplants. Most epiphytic bromeliads collect water in their central ‘tank’ or ‘cup.’ Keep this reservoir filled with clean, fresh water, flushing it out every 1-2 weeks to prevent stagnation and bacterial growth. Use distilled water, rainwater, or filtered tap water, as chemicals like chlorine and fluoride can build up and harm the plant. For terrestrial bromeliads or those with less pronounced cups, water the potting mix thoroughly when the top inch or two feels dry, allowing excess water to drain completely.
The ‘Cup’ Method vs. Soil Watering
- For ‘Tank’ Bromeliads (e.g., Guzmania, Vriesea): Fill the central cup with water. Empty and refill every 1-2 weeks. Lightly moisten the potting mix once a month, ensuring it doesn’t stay soggy.
- For Terrestrial or ‘Non-Tank’ Bromeliads (e.g., Cryptanthus): Water the potting mix directly when the top 1-2 inches are dry. Ensure excellent drainage.
Never let your bromeliad sit in standing water in its saucer, as this can lead to root rot. A good quality moisture meter (e.g., a simple three-in-one meter for about $10-$15) can be helpful for terrestrial types to gauge soil moisture accurately.
Humidity, Temperature, and Air Circulation
Bromeliads are tropical plants, so they appreciate warmth and moderate to high humidity. Aim for temperatures between 65-80°F (18-27°C) during the day and no lower than 55°F (13°C) at night. Protect them from cold drafts. While they can tolerate average household humidity, they’ll flourish with 50-70% humidity. You can boost humidity by placing the pot on a pebble tray filled with water (ensuring the pot doesn’t sit directly in the water), grouping plants together, or using a room humidifier. Good air circulation is also crucial to prevent fungal issues, especially when humidity is high. Avoid stagnant air around your plants.
Potting and Feeding Your Bromeliad
Bromeliads are not heavy feeders. For epiphytic types, their roots are mainly for anchoring, so a fast-draining, airy potting mix is essential. An orchid bark mix or a specialized bromeliad potting mix (often a blend of bark, perlite, and peat moss) works well. Brands like Espoma or FoxFarm offer suitable options, typically costing $10-$20 for a small bag. When potting, choose a pot only slightly larger than the root ball, as they prefer to be a bit root-bound. Terrestrial bromeliads can use a slightly richer, well-draining houseplant mix.
Fertilize sparingly. Over-fertilizing can burn their delicate leaves. For ‘tank’ bromeliads, dilute a balanced liquid fertilizer (e.g., a 20-20-20 or similar houseplant food) to 1/4 or even 1/8 strength. Apply it once a month during the growing season (spring and summer) directly into the cup, or spray a foliar feed onto the leaves. For terrestrial types, apply diluted fertilizer to the soil. Avoid fertilizing the cup of tank bromeliads with strong solutions, as it can burn the delicate tissues.
Propagation and the ‘Pup’ Cycle
Bromeliads typically bloom once in their lifetime. After flowering, the ‘mother’ plant will gradually decline, but not before producing ‘pups’ or offsets around its base. These pups are the key to propagation and enjoying an endless cycle of bromeliad beauty.
Separating Bromeliad Pups: A Step-by-Step Guide
- Wait for Maturity: Allow pups to grow to about one-third to one-half the size of the mother plant. They should have developed their own root system.
- Prepare Tools: Sterilize a sharp knife or pruning shears with rubbing alcohol to prevent disease transmission.
- Locate the Connection: Carefully remove the mother plant from its pot. Identify where the pup connects to the mother plant’s rhizome.
- Make the Cut: With a clean, swift cut, sever the pup from the mother plant, ensuring the pup has some roots attached.
- Potting the Pup: Plant the pup in a small pot (3-4 inches) filled with a well-draining bromeliad or orchid mix.
- Initial Care: Water lightly and place in a warm, bright spot with indirect light. The pup will take 1-3 years to mature and bloom.
Troubleshooting Common Bromeliad Issues
Bromeliads are generally pest-resistant, but occasional issues can arise:
- Brown Leaf Tips: Often a sign of low humidity, inconsistent watering, or mineral buildup from tap water. Use filtered water and increase humidity.
- Pale, Stretched Leaves: Indicates insufficient light. Move to a brighter location.
- Scorched Leaves: Too much direct sun. Relocate to a shadier spot.
- Soft, Mushy Base or Foul Odor in Cup: Likely root or crown rot from stagnant water in the cup or overwatering the soil. Ensure good drainage and regular cup flushing.
- Pests: Mealybugs or scale can sometimes appear. Treat with neem oil or insecticidal soap, following product instructions.
Bromeliad Care Requirements Comparison
| Aspect | Requirement | Notes |
|---|---|---|
| Light | Bright, indirect light | Avoid direct afternoon sun. East-facing window ideal. |
| Water | Keep cup filled (epiphytes); topsoil dry (terrestrials) | Flush cup every 1-2 weeks. Use distilled/filtered water. |
| Humidity | Moderate to High (50-70%) | Pebble trays, grouping plants, humidifier help. |
| Soil/Potting Mix | Fast-draining, airy (orchid mix, bromeliad mix) | Roots are for anchoring. Small pot size. |
| Temperature | 65-80°F (18-27°C) | Avoid temperatures below 55°F (13°C) and cold drafts. |
Frequently Asked Questions About Bromeliad Care
How long do bromeliad blooms last?
Bromeliad blooms are renowned for their longevity! While the actual flowers may only last a few days, the colorful bracts (modified leaves) that surround them can retain their vibrant hue for anywhere from 3 to 6 months, or even longer, depending on the species and environmental conditions.
Do bromeliads need fertilizer?
Bromeliads are light feeders. Fertilize sparingly, if at all. For ‘tank’ bromeliads, use a highly diluted (1/4 to 1/8 strength) liquid houseplant fertilizer applied to the cup or as a foliar spray during the growing season (spring/summer). Terrestrial types can have diluted fertilizer applied to the soil. Over-fertilizing can harm the plant.
Why is my bromeliad not blooming?
Lack of blooming is often due to insufficient light. Ensure your bromeliad receives bright, indirect light. It also might not be mature enough, as pups typically take 1-3 years to bloom. Some growers use a trick: place a ripe apple near the plant under a plastic bag for a week. The ethylene gas released by the apple can sometimes trigger blooming.
Can I plant bromeliads outdoors in the US?
Only in USDA hardiness zones 9-11, where temperatures rarely drop below freezing. In these warmer climates (e.g., Florida, Southern California), many bromeliad species can thrive outdoors in shady, protected areas. For most of the US, bromeliads are best kept as indoor plants, or moved outdoors during warm summer months and brought back inside before temperatures drop.
What kind of water should I use for my bromeliad?
Bromeliads are sensitive to the chemicals found in tap water. It’s best to use distilled water, rainwater, or filtered tap water (e.g., from a Brita filter). If you must use tap water, let it sit out for 24 hours to allow chlorine to dissipate, but this won’t remove fluoride. Regularly flushing the cup helps prevent mineral buildup.