Planting Your Smart Garden 9: Easy Steps for Growing Herbs in Abu Dhabi
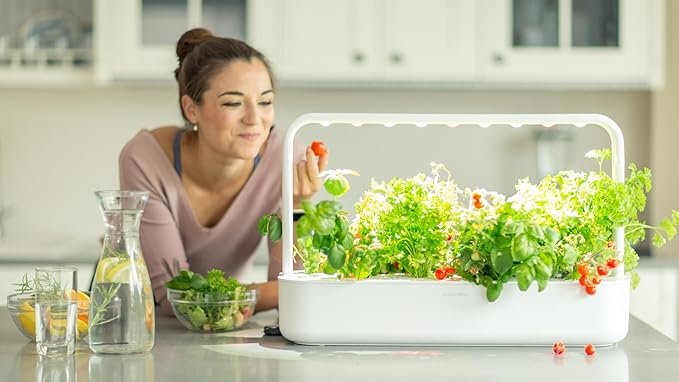
Ya salam, fellow plant enthusiasts! If you’ve been following along, you know the excitement has been building. We’ve unboxed our incredible smart garden, admired its sleek design, and now, finally, it’s time for the moment we’ve all been waiting for: planting! There’s nothing quite like the feeling of setting up your very own indoor farm, especially here in the heart of Abu Dhabi, knowing that fresh, homegrown herbs are just weeks away.
Today, we’re diving into the super simple steps to get your Click & Grow Smart Garden 9 up and running. Trust me, if I can do it after a long day in the Dubai heat, anyone can! This system truly makes gardening effortless, and if you’re curious about getting your own smart garden, I highly recommend checking out the Click & Grow Smart Garden 9 – it’s been a game-changer for me!
Here’s how we plant our smart garden pods and kickstart the growth cycle:
- Step 1: Unpack Your Plant Pods. Your Smart Garden 9 comes with a selection of plant pods, usually three mini-tomatoes, three basil, and three lettuce to get you started. Gently remove them from their packaging. Each pod is a little self-contained wonder, ready to sprout!
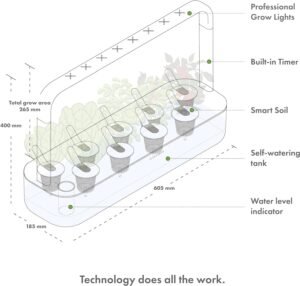
- Step 2: Place Pods into the Cups. You’ll see nine planting cups on the garden’s deck. Simply drop one plant pod into each cup. There’s no need to push or force them; they fit snugly. Make sure the little label on the pod is facing upwards so you know what you’ve planted!
- Step 3: Fill the Water Tank. Now for the essential part – water! Locate the water reservoir at the base of your smart garden. Fill it with fresh, room-temperature water up to the ‘MAX’ indicator.UAE Indoor Gardening Tip 1: While the Smart Garden 9 is brilliant at managing water, in our dry UAE climate, plants can sometimes be thirstier than expected. I’ve found that using filtered water (like from a Brita jug) instead of direct tap water can make a difference, as our desalinated tap water can sometimes have mineral variations that sensitive young plants might not love. Keep an eye on that water level indicator!
- Step 4: Plug It In and Let There Be Light! Connect the power adapter to your smart garden and plug it into a wall socket. The LED grow lights will automatically switch on. These lights operate on a specific cycle (usually 16 hours on, 8 hours off) to mimic natural daylight.UAE Indoor Gardening Tip 2: Consistency is key for light. Even though our apartments might have bright windows, the smart garden’s integrated grow lights are specifically tuned for optimal plant growth. Try to place your garden where its light cycle won’t be heavily disrupted by other strong artificial lights or inconsistent natural light, especially during its “off” cycle. This helps prevent leggy growth and encourages strong, healthy plants.
- Step 5: Add the Domes (Optional but Recommended for Germination). If your kit came with clear germination domes, place one over each plant pod. These little domes create a miniature greenhouse effect, trapping humidity and warmth which greatly aids in germination, especially in our air-conditioned environments. Remove them once seedlings touch the dome or after about 1-2 weeks.UAE Indoor Gardening Tip 3: Our indoor humidity levels can be quite low due to air conditioning. For the first few days, these germination domes are gold. They maintain a stable microclimate, which is crucial for seeds to sprout successfully. Monitor them daily; once you see little green shoots, you can start to remove the domes gradually to acclimate them to the ambient air.
And just like that, you’re done with the setup! Now comes the exciting waiting game. Over the next few days and weeks, you’ll start to see tiny green shoots emerge from the pods, reaching for the light. It’s truly a magical transformation right in your living room.
Next up in Part 6, we’ll be talking about those first glorious sprouts, what to expect in the early days, and how to troubleshoot any minor issues as our Smart Garden 9 truly comes to life! Get ready for some serious green therapy!