
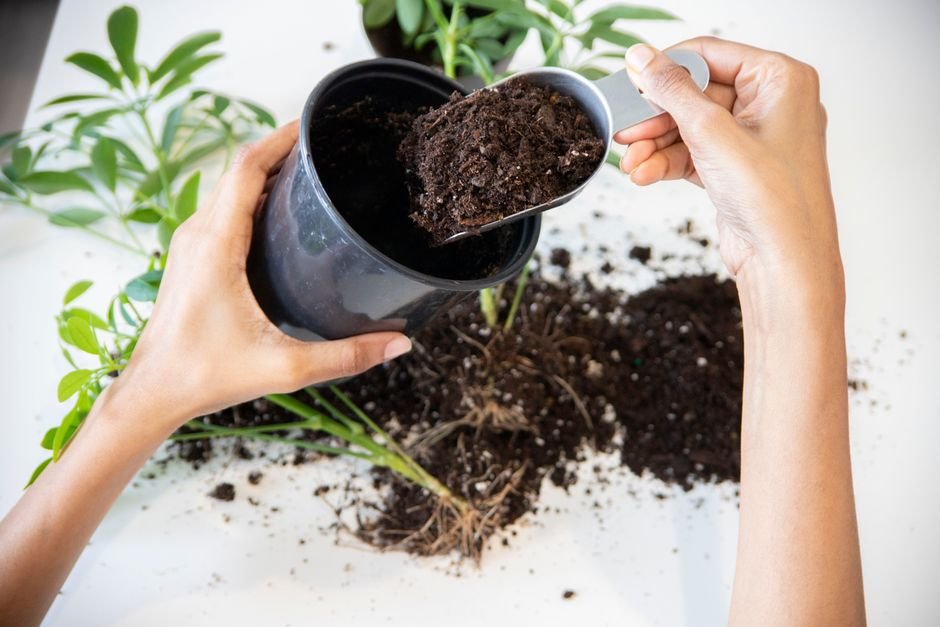

As a devoted plant parent, few sights are as disheartening as a struggling houseplant. Often, the culprit isn’t pest infestation or improper watering, but rather a plant that has outgrown its home – a condition known as being root-bound. When roots become so dense they fill the entire pot, circling endlessly and leaving little room for soil, water, and nutrients, your plant’s health will inevitably decline. Learning how to repot a root-bound plant effectively is a fundamental skill that can revitalize your green companions, promoting lush foliage and vigorous growth. This comprehensive guide will walk you through every critical step, ensuring a successful transition for your beloved plants.
Recognizing the Signs of a Root-Bound Plant
Identifying a root-bound plant early can save it from significant stress. Look for several tell-tale indicators. Visually, you might see roots emerging from the drainage holes at the bottom of the pot, or even growing on the soil surface. When you gently try to lift the plant, you might find the entire root ball comes out in one solid mass, retaining the pot’s shape, with roots tightly circling the perimeter. Beyond the visual cues, observe your plant’s behavior: stunted growth, yellowing leaves, or frequent wilting despite regular watering are common symptoms. The soil may also dry out much faster than usual, indicating that roots are displacing the soil’s capacity to retain moisture.
Essential Tools and Materials for a Successful Repot
Preparation is key to a smooth repotting process. Gather all your supplies before you begin to minimize stress on your plant. You’ll need a new pot, fresh potting mix, sharp pruning shears or a clean knife, gardening gloves, a watering can, and a tarp or newspaper to protect your workspace. Choosing the right size and type of pot, along with a high-quality potting mix, are crucial decisions that impact your plant’s long-term health.
Choosing the Right Pot Size
Resist the urge to jump to a significantly larger pot. For most plants, a new pot that is only 1 to 2 inches wider in diameter than the old one is ideal. Too large a pot can lead to excessive moisture retention, increasing the risk of root rot. Consider the material: terracotta pots offer excellent breathability and are great for plants that prefer drier conditions, while plastic pots retain moisture longer, suitable for thirstier species. Always ensure the new pot has adequate drainage holes.
Selecting the Best Potting Mix
The right potting mix provides essential nutrients, aeration, and drainage. Avoid using garden soil, which can compact and harbor pests. For most houseplants, a well-draining, all-purpose potting mix like FoxFarm Ocean Forest Potting Soil or Miracle-Gro Indoor Potting Mix works well. For specific plants, tailor your choice: a cactus/succulent mix for arid lovers, or an orchid bark mix for epiphytes. Adding perlite or coco coir can further enhance drainage and aeration if your chosen mix feels too dense.
The Step-by-Step Process of Repotting a Root-Bound Plant
Now that you’ve gathered your tools and materials, let’s get down to the hands-on process. Approach each step with care and patience to ensure your plant experiences minimal shock.
- Water Your Plant: A day or two before repotting, thoroughly water your plant. This hydrates the plant and makes it easier to remove from its current pot, as the soil will stick together better.
- Prepare Your Workspace: Lay down a tarp or newspaper to catch spilled soil. Have your new pot ready with a layer of fresh potting mix at the bottom, enough so that when your plant is placed, the top of its root ball will be about an inch below the rim of the new pot.
- Gently Remove the Plant: Invert the plant while supporting the base of the stem with one hand. Tap the bottom of the pot or gently squeeze a plastic pot to loosen the root ball. If it’s stuck, you might need to carefully run a clean knife around the inside edge of the pot.
- Inspect and Loosen the Root Ball: Once removed, examine the roots. If they are tightly circling, use your fingers or a clean knife to gently tease them apart. Loosen the bottom third of the root ball, untangling as many roots as possible.
- Prune as Needed: Using sharp, sterile pruning shears, trim away any dead, mushy, or excessively long roots. For severely root-bound plants, you can make a few vertical cuts (about 1 inch deep) into the root ball to encourage new outward growth.
- Place in New Pot: Center the plant in its new pot, ensuring the top of the root ball is at the appropriate level.
- Add Fresh Potting Mix: Fill the pot with fresh potting mix, gently tamping it down around the roots to remove large air pockets. Leave about an inch of space from the soil surface to the pot’s rim for watering.
- Water Thoroughly: Water the plant immediately after repotting until water drains from the bottom. This helps settle the soil and provides initial hydration.
Pruning and Root Ball Management
When dealing with a severely root-bound plant, pruning is essential. Don’t be afraid to cut away up to one-third of the root mass, especially those thick, circling roots that have lost their functionality. These older roots are less efficient at absorbing water and nutrients. Making vertical cuts encourages the plant to send out new feeder roots, which are much more effective. Always use sterilized tools to prevent disease transmission.
Post-Repotting Care: Ensuring a Smooth Transition
The first few weeks after repotting are crucial for your plant’s recovery. It’s normal for plants to experience some degree of ‘transplant shock,’ which might manifest as temporary wilting or leaf drop. Provide a stable environment to help it adjust.
Place your newly repotted plant in a spot with indirect light, away from direct sun, cold drafts, or extreme temperature fluctuations. Avoid fertilizing for at least 4-6 weeks, as the fresh potting mix typically contains sufficient nutrients, and adding more could burn delicate new roots. Monitor soil moisture carefully; while the plant needs consistent hydration, overwatering can be detrimental. A reliable tool like the XLUX T10 Soil Moisture Meter can help you accurately gauge when your plant truly needs water, preventing both underwatering and overwatering during this sensitive period.
Long-Term Care and Preventing Future Root-Bound Issues
Preventing future root-bound conditions is an ongoing process of attentive care. Establish a regular repotting schedule based on your plant’s growth rate – fast growers like Pothos or Spider Plants might need repotting every 1-2 years, while slower growers like Snake Plants or ZZ Plants can go 3-5 years. Regularly check your plant’s root system every year or so by gently lifting it from its pot.
Ensure your plants receive adequate light to support robust growth. If natural light is insufficient, consider supplementing with a full-spectrum grow light, such as the Spider Farmer SF-1000, to maintain vigorous growth and prevent the plant from becoming root-bound prematurely due to lack of energy. When you do resume fertilizing after the initial adjustment period, use a balanced liquid fertilizer, like Liqui-Dirt Nano Powder, diluted to half strength, to encourage healthy root and foliage development. Remember, some plants, like Peace Lilies or Hoyas, actually prefer to be slightly root-bound to flower, so always research your specific plant’s preferences.
Common Houseplant Care Requirements Comparison
Understanding the general needs of popular houseplants can help you maintain their health and know when repotting might be necessary.
| Plant | Light | Water | Humidity | Soil | Temperature |
|---|---|---|---|---|---|
| Pothos | Low to Medium Indirect | Allow top inch to dry | Moderate (40-60%) | Well-draining, all-purpose | 65-80°F (18-27°C) |
| Snake Plant | Low to Bright Indirect | Allow soil to dry completely | Low (30-40%) | Cactus/succulent mix | 65-90°F (18-32°C) |
| Fiddle Leaf Fig | Bright Indirect | Allow top 2-3 inches to dry | Moderate to High (50-70%) | Rich, well-draining | 60-80°F (15-27°C) |
| Peace Lily | Low to Medium Indirect | Keep consistently moist | High (60%+) | Rich, well-draining | 65-80°F (18-27°C) |
Frequently Asked Questions About Repotting
How often should I repot a plant?
The frequency depends on the plant’s growth rate. Fast growers might need repotting every 1-2 years, while slow growers can go 3-5 years. Always check for signs of root-bound conditions rather than strictly adhering to a schedule.
Can I repot a plant into a much larger pot?
It’s generally not recommended. A pot that’s too large holds excessive moisture, which can lead to root rot. Aim for a pot that’s only 1-2 inches wider in diameter than the previous one.
What if my plant goes into shock after repotting?
Transplant shock is common. Keep the plant in a stable environment with indirect light, consistent temperatures, and moderate humidity. Avoid fertilizing and ensure proper watering, but don’t overwater. Most plants recover within a few weeks.
Should I fertilize immediately after repotting?
No, it’s best to wait at least 4-6 weeks. Fresh potting mix usually contains enough nutrients for this period, and fertilizing too soon can burn delicate new roots that are trying to establish themselves.
What’s the best time of year to repot a plant?
The best time to repot most houseplants is during their active growing season, typically spring or early summer. This allows the plant to recover quickly and put energy into new root and foliage growth.
Do all plants hate being root-bound?
While most plants benefit from repotting when root-bound, some species, like Peace Lilies, Hoyas, or many tropical flowering plants, actually prefer to be slightly root-bound to encourage blooming. Always research your specific plant’s needs.