
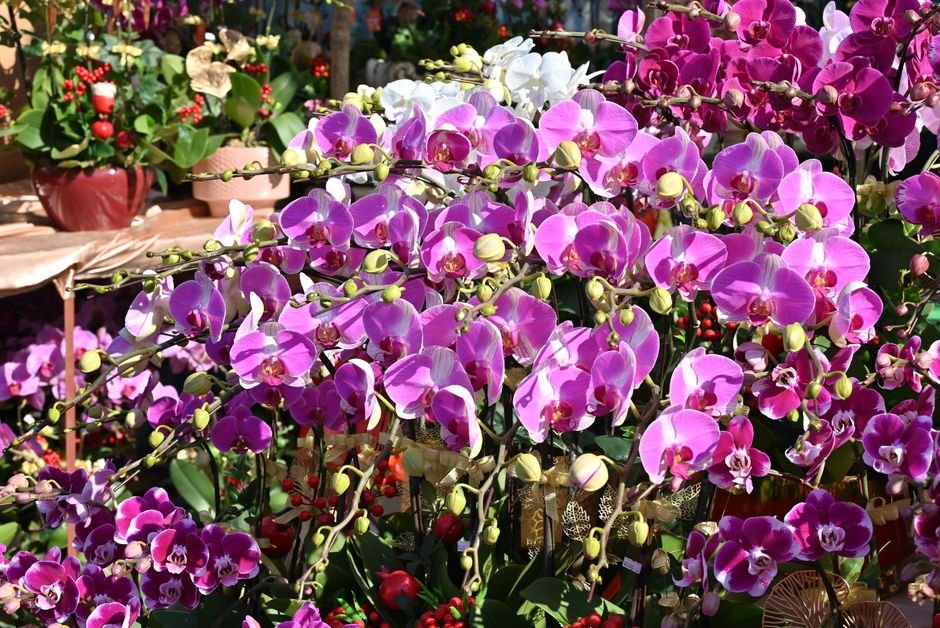

Welcome, fellow plant enthusiasts! If you’ve ever admired the elegant beauty of a Phalaenopsis orchid and wondered if you could keep one thriving, you’re in the right place. Often called ‘Moth Orchids’ due to their petal shape, Phalaenopsis are among the most popular and forgiving orchids, making them an excellent choice for orchid care for beginners. With the right approach, these stunning plants can grace your home with their long-lasting blooms for months. Let’s dive into the essential Phalaenopsis growing tips that will transform you into a confident orchid parent.
Understanding Your Phalaenopsis: The Basics
Before we delve into specific care, it’s helpful to understand the Phalaenopsis orchid’s natural habitat. Unlike most houseplants that grow in soil, Phalaenopsis are epiphytes. This means they naturally grow on trees in tropical rainforests, using their roots to anchor themselves to bark and absorb moisture and nutrients from the air and rain. They are not parasitic; they simply use the trees for support. This unique growing habit profoundly influences how we care for them in our homes, particularly regarding their potting medium and watering needs.
The Art of Watering: When and How Much
Proper watering is perhaps the most critical aspect of successful Phalaenopsis care, and it’s where many beginners falter. The key is to water thoroughly but infrequently, allowing the roots to dry out slightly between waterings. Overwatering is the number one killer of orchids, leading to root rot. A good rule of thumb is to water when the potting medium feels dry and the roots, visible through a clear pot, appear silvery-gray rather than plump and green.
Recognizing Thirst Signals
Your orchid will communicate its needs. If roots are shriveled or the plant feels surprisingly light, it’s likely thirsty. Conversely, constantly wet roots or a mushy feel indicate overwatering. Consider investing in a simple moisture meter, available for around $10-$15 at garden centers, to help gauge moisture levels in the potting medium, especially if you’re unsure.
Water Quality Matters
Tap water is often fine, but if your local water is heavily chlorinated or very hard, consider using filtered water or rainwater. Always use room-temperature water. A popular method is the ‘soak and drain’ technique: place the potted orchid in a sink or basin, pour water through the potting medium for a minute or two, allowing it to drain completely. Never let your orchid sit in standing water.
Illuminating Success: Light Requirements
Phalaenopsis orchids thrive in bright, indirect light. Think of the light near an east-facing window, or a shaded south or west-facing window. Direct, harsh sunlight can scorch their leaves, leaving unsightly brown or red patches. Insufficient light, however, is a common reason for an orchid refusing to bloom. If your orchid isn’t flowering, try moving it to a brighter spot.
If natural light is scarce in your home, especially during darker winter months, a full-spectrum LED grow light can be a fantastic solution. Many compact LED grow lights cost between $25-$50 and can provide the consistent bright, indirect light your orchid craves, ensuring robust growth and encouraging re-blooming.
Potting Perfection: Choosing the Right Medium and Container
Traditional potting soil is a no-go for Phalaenopsis. Their epiphytic roots need excellent air circulation and drainage. The ideal potting medium mimics their natural environment, providing support while allowing air to reach the roots.
Common orchid potting mixes include fir bark, sphagnum moss, charcoal, and perlite. Many commercially available orchid mixes, such as those from reputable brands like RepotMe or Better-Gro, are specifically formulated for Phalaenopsis. Clear plastic pots with drainage holes are highly recommended as they allow you to monitor root health and moisture levels easily. Some even come with slits for extra aeration.
Repotting Your Phalaenopsis
Phalaenopsis typically need repotting every 1-2 years, or when the potting medium starts to break down, becoming soggy and retaining too much moisture. Signs include roots growing out of the pot, or a general decline in plant vigor.
- Gather Supplies: New orchid pot (same size or slightly larger), fresh orchid potting mix, sterilized pruning shears.
- Remove Old Medium: Carefully take the orchid out of its old pot. Gently remove as much of the old potting medium as possible from the roots.
- Inspect and Trim Roots: Examine the roots. Trim away any dead, mushy, or shriveled roots using your sterilized shears. Healthy roots are firm and plump.
- Place in New Pot: Position the orchid in the new pot, ensuring the base of the plant (where roots meet leaves) is level with the rim.
- Add New Medium: Carefully fill around the roots with fresh potting mix, gently tapping the pot to settle the medium. Avoid compacting it too tightly; air circulation is key.
- Water Lightly: After repotting, wait about a week before a full watering to allow any small root wounds to heal.
Feeding Your Orchid: Fertilization Essentials
While Phalaenopsis don’t need heavy feeding, regular, dilute fertilization encourages strong growth and abundant blooms. The general rule for orchids is ‘weakly, weekly’ – meaning a diluted solution applied more frequently. Use a balanced orchid-specific fertilizer, such as a 20-20-20 or 10-10-10 formula, at about ¼ to ½ strength with every other watering. During the blooming phase, you might switch to a ‘bloom booster’ fertilizer with a higher phosphorus content, like a 10-30-20, to support flower development. Brands like Dyna-Gro Orchid-Pro or MSU Orchid Fertilizer are excellent choices, typically costing $15-$30 for a bottle that lasts a long time.
Humidity and Temperature: Creating the Ideal Environment
Being tropical plants, Phalaenopsis appreciate high humidity (50-70%). Most homes, especially with heating or air conditioning, are drier than this. You can boost humidity around your orchid by placing it on a pebble tray filled with water (ensuring the pot doesn’t sit directly in the water), grouping it with other plants, or using a room humidifier. Small humidifiers can be purchased for $30-$60.
As for temperature, Phalaenopsis prefer daytime temperatures between 65-80°F (18-27°C) and nighttime temperatures slightly cooler, around 60-65°F (15-18°C). This slight temperature drop at night can actually help trigger blooming. Avoid placing your orchid near drafty windows, heating vents, or air conditioning units, which can cause sudden temperature fluctuations and dry out the plant.
Phalaenopsis Orchid Care Requirements Comparison
| Requirement | Ideal Conditions | Notes for Beginners |
|---|---|---|
| Light | Bright, indirect light | East-facing window is ideal; avoid direct sun. Use grow lights if needed. |
| Water | Thoroughly when roots are silvery-gray and medium is dry | ‘Soak and drain’ method. Overwatering causes root rot. |
| Humidity | 50-70% | Use pebble trays or humidifiers, especially in dry indoor environments. |
| Soil/Medium | Coarse, well-draining orchid bark mix or sphagnum moss | Never use traditional potting soil. Repot every 1-2 years. |
| Temperature | Day: 65-80°F (18-27°C) Night: 60-65°F (15-18°C) | Consistent temperatures are best; avoid drafts and extreme fluctuations. |
Frequently Asked Questions About Phalaenopsis Care
Why isn’t my Phalaenopsis orchid blooming?
Lack of blooms is often due to insufficient light. Try moving your orchid to a brighter location, ensuring it still receives indirect light. A slight drop in nighttime temperatures (5-10°F below daytime) can also help trigger flower spikes. Ensure consistent watering and a balanced fertilization routine.
How often should I repot my Phalaenopsis?
Aim to repot every 1 to 2 years, or when the potting medium starts to decompose and become soggy. You’ll also want to repot if the roots have completely outgrown the pot. Repotting provides fresh medium and allows you to inspect root health.
What are aerial roots? Should I cut them?
Aerial roots are roots that grow outside the pot into the air. This is completely normal for epiphytic orchids like Phalaenopsis and indicates a healthy plant. Do not cut them! They help the plant absorb moisture and nutrients from the air. Only trim if they are clearly shriveled, dried, or rotting.
My orchid’s leaves are turning yellow, what’s wrong?
Yellowing leaves can indicate several issues. Overwatering is a common culprit, leading to root rot which prevents nutrient uptake. Underwatering can also cause yellowing and shriveling. Additionally, too much direct sunlight can scorch leaves, causing them to yellow and brown. Assess your watering habits and light exposure.
Can I use ice cubes to water my Phalaenopsis orchid?
While some sources suggest ice cubes, it’s generally not recommended by horticulturists. Phalaenopsis are tropical plants, and cold water can shock their roots. The slow melt also doesn’t provide the thorough flushing that orchids prefer, which is essential for removing salt buildup. Stick to room-temperature water and the ‘soak and drain’ method for optimal health.
What kind of pot is best for Phalaenopsis?
Clear plastic pots with ample drainage holes are ideal. They allow you to easily monitor root health and moisture levels, which is crucial for preventing overwatering. Many growers also prefer pots with side slits for enhanced air circulation. Clay pots can work, but they dry out faster, requiring more frequent watering.
With these comprehensive Phalaenopsis growing tips, you’re well on your way to enjoying beautiful, long-lasting blooms. Remember, consistency and observation are your best tools. Don’t be afraid to adjust your routine based on your orchid’s response and your home’s specific conditions. Happy growing!