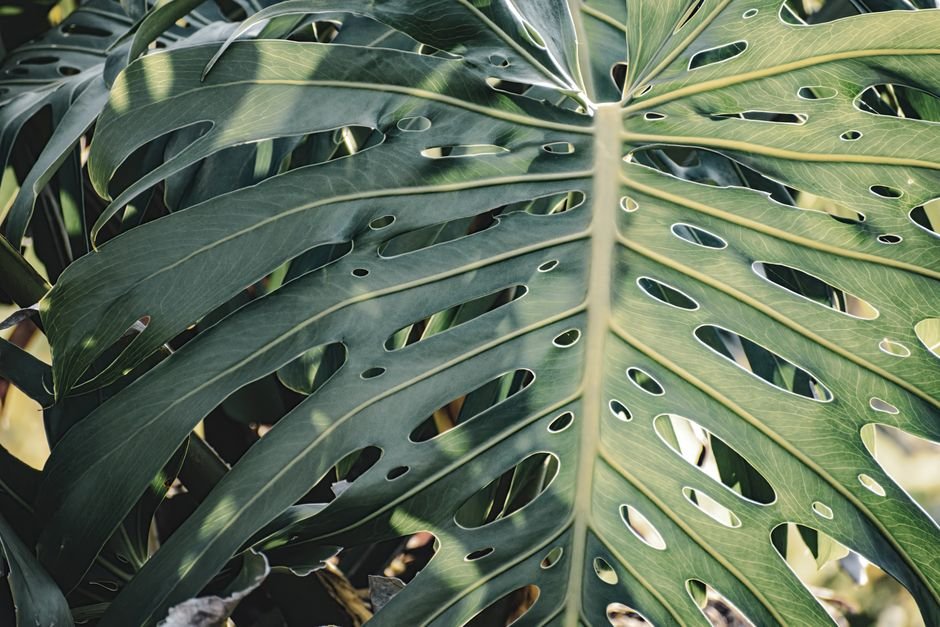
Welcome, fellow plant enthusiasts! Few houseplants capture our hearts quite like the magnificent Monstera, with its iconic fenestrated leaves and vigorous growth. Owning one is a joy, but imagine the satisfaction of creating more from your beloved mother plant! Learning how to propagate Monstera from cuttings at home is not only incredibly rewarding but also an economical way to expand your collection, share with friends, or simply prune your existing plant for healthier growth. At PlantsMag.com, we’re dedicated to empowering US plant lovers with expert knowledge, and this guide will walk you through every step, ensuring your Monstera propagation journey is a resounding success.
Why Propagate Monstera?
Propagating your Monstera offers a multitude of benefits beyond simply getting more plants. It’s an excellent way to rejuvenate an leggy or overgrown specimen, transforming what might be considered waste into new life. For those seeking to expand their indoor jungle without breaking the bank, propagation is key. It also provides a fantastic opportunity to share the joy of plant parenthood, gifting rooted cuttings to friends and family. Plus, the process itself is a deeply satisfying hands-on experience, connecting you more intimately with your plants’ life cycle.
Essential Tools and Materials for Success
Before you make that first cut, gathering the right tools will set you up for success. You don’t need a professional setup, but quality materials make a difference.
Choosing the Right Cutting Tool
A clean, sharp cut is paramount to prevent disease and encourage quick rooting. Invest in a pair of sharp pruning shears or a clean, sterile knife. We recommend options like Fiskars Micro-Tip Pruning Snips (available at most garden centers for around $15-20), which offer precision. Always sterilize your tool with rubbing alcohol before and after each use to avoid transmitting pathogens to your plant.
Propagation Mediums
You have several excellent choices for rooting your Monstera cuttings, each with its own advantages:
- Water: The simplest method, allowing you to watch roots develop. Requires frequent water changes.
- Sphagnum Moss: Excellent moisture retention and aeration. A popular choice for robust root development.
- Perlite: Offers fantastic aeration and drainage, preventing rot. Often used in conjunction with other mediums.
- Aroid Potting Mix: A chunky, well-draining soil mix (e.g., FoxFarm Ocean Forest Potting Soil, around $20 for a large bag) can be used directly, especially for larger, more mature cuttings.
Other helpful items include small clear containers or jars for water propagation, small nursery pots (4-6 inch) for potting up, and optionally, a rooting hormone like Clonex Rooting Gel (around $10-15), which can significantly speed up root development.
Step-by-Step Guide to Taking and Rooting Monstera Cuttings
This is where the magic happens! Follow these steps carefully for the best chance of success.
- Identify a Healthy Stem Node: Look for a healthy stem section that includes at least one node. A node is a small bump on the stem where a leaf or an aerial root emerges. These nodes are crucial because they contain the meristematic tissue responsible for new root growth. Ensure your chosen section has at least one healthy leaf attached.
- Make a Clean Cut: Using your sterilized pruning shears or knife, make a clean cut about half an inch to an inch below the node. Avoid crushing the stem. A good cutting will typically have 1-2 leaves and 1-2 nodes.
- Prepare the Cutting: Remove any leaves that would be submerged in your chosen propagation medium. If using rooting hormone, dip the cut end of the stem (including the node) into the hormone powder or gel.
- Choose Your Propagation Method:
- Water Propagation: Place the cutting in a clear jar or vase, ensuring the node(s) are submerged but the leaves are above the waterline. Change the water every 3-5 days to prevent bacterial growth.
- Sphagnum Moss or Perlite: Lightly moisten your sphagnum moss or perlite. Place the cutting in a small container filled with the moist medium, ensuring the node is covered. Keep the medium consistently damp but not soggy.
- Soil Propagation: For a more direct approach, plant the cutting directly into a small pot (4-6 inches) filled with a well-draining aroid mix. Ensure the node is buried. You can create a mini-greenhouse effect by covering the pot with a clear plastic bag or dome to maintain high humidity.
- Provide Optimal Conditions: Place your cutting in a warm spot with bright, indirect light. Avoid direct sunlight, which can scorch the delicate cutting. An ideal temperature range is 70-80°F (21-27°C). If your home is dim, consider a low-wattage grow light, such as a GE Grow Light LED, for 12-14 hours a day to encourage robust growth.
- Monitor and Transplant: Roots typically begin to form within 2-6 weeks, though it can take longer depending on conditions and Monstera variety. For water propagation, wait until roots are at least 2-3 inches long before transplanting into a well-draining aroid potting mix. For moss/perlite/soil propagation, gently tug on the cutting; if you feel resistance, it’s likely rooted enough to transition to a permanent pot if not already in soil.
Aftercare for Your New Monstera Plantlets
Once your Monstera cuttings have established roots and are potted, proper care is crucial for their long-term health and growth. Think of them as baby plants needing gentle nurturing.
- Light: Continue to provide bright, indirect light. A spot near an east or west-facing window is often ideal. Too little light can lead to leggy growth, while too much direct sun can burn the leaves.
- Water: Water thoroughly when the top 1-2 inches of soil feel dry. A good quality moisture meter, like the XLUX T10 (around $12-18), can be invaluable in accurately assessing soil moisture and preventing overwatering, which is a common killer of young plants.
- Humidity: Monsteras thrive in high humidity. You can increase humidity by grouping plants together, placing the pot on a pebble tray filled with water, or using a room humidifier.
- Soil: Ensure your plant is in a chunky, well-aerated potting mix. Brands like Espoma Organic Potting Mix (around $15 for a large bag) mixed with perlite or orchid bark work wonders for Monsteras.
- Fertilizing: Wait about 4-6 weeks after potting before introducing fertilizer. Start with a diluted, balanced liquid fertilizer (e.g., FoxFarm Grow Big or Dyna-Gro Foliage-Pro, both around $15-25) at half strength during the growing season (spring and summer).
- Pest Watch: Young plants can be more susceptible to pests. Regularly inspect your plantlets for common issues like spider mites or mealybugs.
Troubleshooting Common Propagation Issues
Even experienced propagators encounter challenges. Here are a few common issues and how to address them:
- No Roots Forming: Ensure your cutting has a node. Check that temperatures are warm enough (70-80°F is ideal). If using water, change it regularly. If using a solid medium, ensure it’s consistently moist but not waterlogged. Rooting hormone can often help accelerate root development.
- Rotting Stem: This is usually due to too much moisture or lack of oxygen, especially in water or overly wet soil. Trim off the rotted part with a sterile tool, let the cut end callus over for a few hours, and then restart in fresh, clean water or a less dense, well-aerated medium like perlite or fresh sphagnum moss.
- Yellowing Leaves: A single yellowing leaf on a new cutting can be normal as the plant redirects energy to root production. However, widespread yellowing can indicate overwatering, nutrient deficiency (after roots are established), or insufficient light. Assess your watering schedule and light conditions.
- Pests: Small cuttings can still attract pests. Isolate any affected plantlets immediately. Treat with insecticidal soap or neem oil according to product instructions.
Comparative Care for Monstera Plants
Understanding the general care requirements for your Monstera will ensure your new propagations thrive into mature, beautiful plants.
| Care Requirement | Optimal Conditions for Monstera |
|---|---|
| Light | Bright, indirect light (e.g., near an east or west-facing window). Avoid direct sun. |
| Water | Water when the top 1-2 inches of soil are dry. Allow excess to drain. |
| Humidity | High (60-80%). Use humidifiers, pebble trays, or group plants. |
| Soil | Chunky, well-draining aroid mix (e.g., potting mix + perlite/orchid bark). |
| Temperature | 65-80°F (18-27°C). Protect from cold drafts. |
Frequently Asked Questions About Monstera Propagation
How long does it take for Monstera cuttings to root?
Rooting time varies, but most Monstera cuttings will show visible roots within 2-6 weeks. Environmental factors like warmth, humidity, and light play a significant role. Some may take a bit longer, so patience is key!
Can I propagate Monstera without a node?
No, a node is absolutely essential for successful Monstera propagation. The node contains dormant meristematic cells that are capable of developing into new roots and shoots. A cutting without a node, often called a ‘leaf cutting’, will typically only survive for a while but won’t produce new growth.
When is the best time to propagate Monstera?
The ideal time to propagate Monstera is during its active growing season, which is typically spring and summer. During these warmer months, plants have more energy for growth, leading to faster and more successful rooting.
What’s the ideal temperature for rooting Monstera?
Monstera cuttings root best in warm conditions, ideally between 70-80°F (21-27°C). Consistent warmth encourages faster cell division and root development. Avoid placing cuttings in cold or drafty areas.
Should I use rooting hormone?
While not strictly necessary, using a rooting hormone can significantly increase your chances of success and speed up the rooting process, especially for less vigorous cuttings or if you’re propagating in less-than-ideal conditions. It’s a beneficial aid for many propagators.
What kind of soil is best for new Monstera plants?
For new Monstera plantlets, a well-draining, airy aroid mix is crucial. A good blend includes standard potting mix, perlite, and orchid bark or coco coir. This ensures excellent drainage and aeration, preventing root rot and promoting healthy root development. Many US growers find success with mixes like Espoma Organic Potting Mix enhanced with extra perlite.
Propagating Monstera from cuttings is a truly gratifying experience that deepens your connection with your plants. With the right tools, a bit of patience, and these expert tips from PlantsMag.com, you’ll be well on your way to creating a thriving collection of these stunning tropical beauties. Happy propagating!