
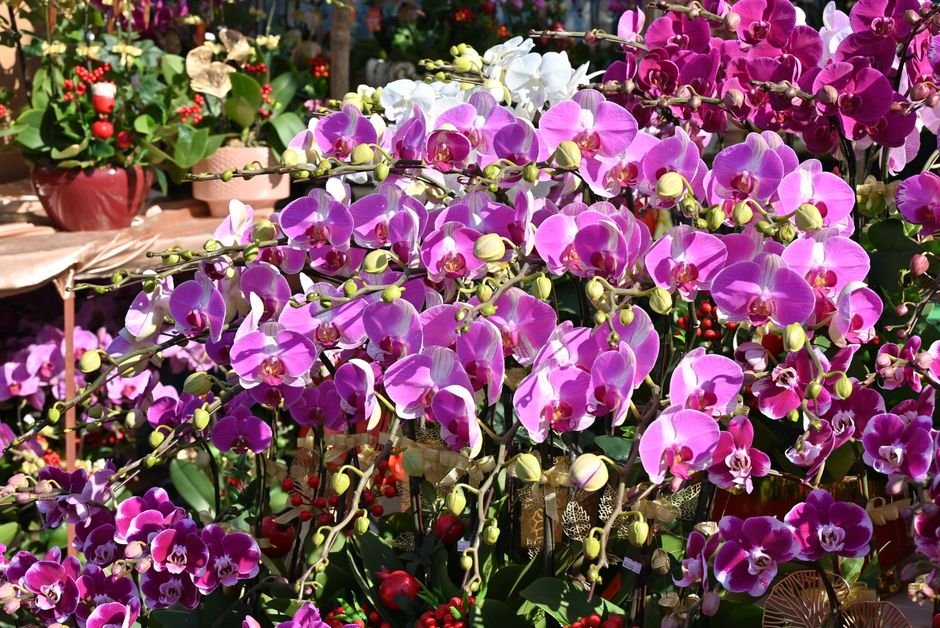

Welcome, fellow plant enthusiasts! As a senior horticulturist at PlantsMag.com, I’m thrilled to guide you through the wonderful world of Phalaenopsis orchids. Often called “Moth Orchids” due to their graceful, moth-like blooms, Phalaenopsis are among the most popular and easiest orchids to grow, making them perfect for beginners. This comprehensive guide to Orchid Care for Beginners will equip you with the knowledge to transform your Phalaenopsis from a temporary houseguest into a long-lasting, reblooming masterpiece.
Understanding Phalaenopsis Light Requirements
Light is paramount for your Phalaenopsis, but not just any light. These orchids thrive in bright, indirect light, mimicking their natural habitat beneath tree canopies. An east-facing window is often ideal, providing gentle morning sun. A north-facing window works well too, offering consistent indirect light. If only a south or west-facing window is available, ensure the light is diffused with a sheer curtain to prevent leaf scorch. Signs of too much light include reddish leaves or sunburn spots, while insufficient light often results in dark green leaves and a reluctance to bloom. If natural light is scarce, consider a full-spectrum LED grow light, like a Barrina T5 or a Sansi LED, positioned about 12-18 inches above the foliage, for 12-14 hours daily to supplement.
The Art of Watering Phalaenopsis Orchids Correctly
Watering is where many beginners falter, but it’s simpler than you think! Forget the ‘ice cube method’ – while it might prevent overwatering, it doesn’t provide the thorough hydration orchids need. Instead, aim to water thoroughly when the potting mix is nearly dry. A good rule of thumb is every 7-10 days, but always check the pot’s weight or use a moisture meter (like the XLUX T10) to gauge dryness. To water, place your orchid in a sink and flush room-temperature water through the potting mix for several minutes until it drains freely from the bottom. Let it drain completely before returning it to its spot. Overwatering is a common killer, leading to root rot, so ensure excellent drainage.
Creating the Ideal Humidity and Airflow Environment
Phalaenopsis orchids are tropical plants, meaning they appreciate high humidity—ideally between 50-70%. Most homes, especially during winter, are much drier. You can increase humidity by placing your orchid on a pebble tray filled with water (ensuring the pot doesn’t sit directly in the water). Grouping plants together also raises local humidity. For consistently low humidity, a small room humidifier (such as a LEVOIT or Honeywell model) can make a significant difference. Good air circulation is equally vital to prevent fungal diseases, especially in humid conditions. Avoid stagnant air around your orchid, but also keep it away from direct drafts from vents or open windows.
Potting and Repotting Phalaenopsis Orchids
The right potting medium and pot are crucial for healthy roots. Unlike typical houseplants, orchids are epiphytes, meaning they grow on trees in nature, not in soil. Their roots need air circulation and excellent drainage. Clear plastic pots are often preferred as they allow you to monitor root health and moisture levels easily.
Choosing the Right Potting Mix
An ideal orchid potting mix is chunky and well-draining. Popular choices include fir bark, sphagnum moss, charcoal, and perlite. Many reputable brands like rePotme or Better-Gro offer pre-mixed orchid potting blends specifically designed for Phalaenopsis. Fir bark provides excellent aeration, while sphagnum moss retains moisture without becoming waterlogged. Avoid standard potting soil at all costs; it will suffocate your orchid’s roots.
Step-by-Step Repotting Guide
Repot your Phalaenopsis every 1-2 years, or when the potting mix begins to break down, typically after blooming. This is essential for providing fresh nutrients and preventing root rot from old, decaying media.
- Gather Supplies: You’ll need fresh orchid potting mix, a clean pot (same size or slightly larger if roots are crowded), sterile pruning shears, and gloves.
- Remove from Old Pot: Gently remove the orchid from its current pot. You may need to wiggle it or carefully cut away the old pot if roots are stuck.
- Inspect and Trim Roots: Carefully remove all old potting media. Inspect the roots, trimming any that are mushy, black, or papery and hollow (dead roots) with your sterile shears. Healthy roots are firm and plump, often white or green.
- Place in New Pot: Position the orchid in the new pot, ensuring the base of the plant is at the same level as before. Carefully work the new potting mix around the roots, ensuring there are no large air pockets but also not compacting it too tightly.
- Water Thoroughly: After repotting, water the orchid thoroughly to settle the new mix. Avoid fertilizing for a few weeks to allow the roots to recover.
Fertilizing for Robust Growth and Abundant Flowers
Orchids aren’t heavy feeders, but consistent fertilization promotes vigorous growth and stunning blooms. The ‘weakly, weekly’ approach is highly recommended: use a balanced orchid-specific fertilizer (e.g., Dyna-Gro Orchid-Pro 7-9-5 or an MSU Orchid Fertilizer) diluted to ¼ to ½ strength with every watering during active growth. Reduce feeding during dormancy or when the plant isn’t actively growing. Every few months, flush the pot with plain water to prevent salt buildup from the fertilizer, which can burn roots. Always fertilize a moist plant, never a dry one.
Optimal Temperature and Environmental Factors
Phalaenopsis orchids are quite adaptable to typical indoor temperatures. They prefer daytime temperatures between 65-80°F (18-27°C) and a slight drop at night, ideally to 60-65°F (15-18°C). This nocturnal temperature drop is particularly important as it helps trigger reblooming. Avoid placing your orchid near drafty windows, heating/AC vents, or exterior doors where temperature fluctuations are extreme. Consistent, stable temperatures within their preferred range will contribute significantly to their overall health and flowering success.
Phalaenopsis Care Quick Reference
| Requirement | Phalaenopsis Orchid Needs |
|---|---|
| Light | Bright, indirect light (East or North window preferred). Avoid direct sun. |
| Water | Thoroughly when potting mix is nearly dry (approx. every 7-10 days). Use room-temp water. |
| Humidity | 50-70%. Use pebble trays or humidifiers. |
| Potting Mix | Chunky, well-draining orchid bark mix or sphagnum moss. Never use regular potting soil. |
| Temperature | Day: 65-80°F (18-27°C). Night: 60-65°F (15-18°C). |
Frequently Asked Questions About Phalaenopsis Care
Why won’t my orchid rebloom?
Lack of reblooming is often due to insufficient light or consistent nighttime temperatures. Ensure your orchid gets bright, indirect light and experiences a 5-10°F (3-6°C) drop in temperature at night for several weeks, especially in fall. Also, ensure you are fertilizing regularly during the growing season.
What are aerial roots and should I trim them?
Aerial roots are the thick, silvery-green roots that grow outside the pot. They are perfectly normal and healthy, helping the orchid absorb moisture and nutrients from the air. Do not trim healthy aerial roots. They are a sign of a happy orchid!
How do I know if I’m overwatering my Phalaenopsis?
Signs of overwatering include yellowing leaves, soft or mushy brown roots, and a foul smell from the potting mix. If you suspect overwatering, unpot your orchid, trim any rotten roots, and repot in fresh, dry media.
Can I use regular potting soil for my orchid?
No, absolutely not. Regular potting soil is too dense and will suffocate your orchid’s roots, leading to root rot. Phalaenopsis orchids require a coarse, well-draining medium like orchid bark, sphagnum moss, or a specialized orchid mix.
My orchid leaves are turning yellow. What’s wrong?
Yellowing leaves can indicate several issues: overwatering (leading to root rot), underwatering (leaves may also wrinkle), too much direct sunlight (leaves may also have red or brown spots), or simply an old leaf naturally dying off. Assess your watering habits, light exposure, and inspect the roots to diagnose the problem.
Caring for Phalaenopsis orchids is a rewarding journey. By understanding their basic needs for light, water, humidity, and proper potting, you’ll be well on your way to enjoying their exquisite, long-lasting blooms year after year. Don’t be afraid to experiment a little and observe your plant’s responses – it will tell you what it needs. Happy growing!
Pro Tips for Advanced Phalaenopsis Cultivation
Beyond the basics, truly thriving Phalaenopsis orchids benefit from nuanced care reflecting years of cultivation experience. Here are insights to elevate your orchid game:
1. The Tactile Test: Beyond Visual Root Inspection
While green roots signify health, their turgidity is the ultimate hydration indicator. Healthy roots, whether aerial or potted, should feel firm and plump to the touch. If they feel soft, spongy, or hollow, it’s a sign of either dehydration or early rot, even if they appear green. Gently squeeze a root if you’re unsure; a truly healthy root will resist compression. Aerial roots, often exposed, are excellent barometers for ambient humidity and can guide your misting or watering frequency for the potted roots, signaling the overall moisture level in your growing environment.
2. Strategic “Controlled Stress” for Consistent Re-blooming
To reliably induce a new flower spike, emulate the natural conditions that trigger blooming. This often involves a period of “controlled stress” after a bloom cycle. Specifically, introduce a slight reduction in nighttime temperatures (a 10-15°F or 5-8°C drop below daytime temps for 2-4 weeks is often effective), and allow the potting medium to dry out a bit more thoroughly between waterings than usual. Coupled with bright, indirect light, this temperature differential and slight drought stress signal to the plant that it’s time to reproduce, stimulating the development of a new flower spike. This technique should only be applied to robust, healthy plants, as undue stress on a weak plant can be detrimental.
3. Advanced Nutrient Management & Media Flushing
Generic orchid fertilizers are a starting point, but optimizing nutrient delivery is key for peak performance. Consider a higher nitrogen (N) fertilizer during active vegetative growth (leaf and root production), switching to a more balanced or slightly higher phosphorus (P) and potassium (K) formula when you want to encourage blooming. Critically, regardless of fertilizer type, regular flushing of the potting medium (every 3-4 waterings with plain, pure water) is essential. This prevents the buildup of mineral salts, which can burn roots, alter media pH, and inhibit nutrient uptake, especially in bark-based media that naturally break down and hold salts. Consistent flushing ensures a clean root environment for optimal nutrient absorption.
Frequently Asked Questions About Advanced Phalaenopsis Care
How do I induce my Phalaenopsis orchid to re-bloom consistently year after year?
To encourage consistent re-blooming, focus on providing a slight temperature differential between day and night (a drop of 10-15°F or 5-8°C is ideal, often achieved naturally near a window during cooler months). Reduce watering frequency slightly after the blooming cycle, allowing the medium to dry out more thoroughly between waterings, but never to the point of dehydration. Ensure adequate bright, indirect light, as insufficient light is a common reason for a lack of blooms. Patience is key; a new flower spike can take several weeks to emerge once conditions are met.
What are the signs of root rot in Phalaenopsis, and how can it be effectively treated and prevented?
Signs of root rot include mushy, discolored (brown or black) roots that often have a foul odor, and yellowing or wilting leaves despite adequate watering. To treat, carefully remove the orchid from its pot, trim away all affected roots with sterilized scissors, and consider a quick dip in a dilute hydrogen peroxide solution (1 part 3% H2O2 to 10 parts water) to sterilize. Repot immediately into fresh, sterile orchid medium, ensuring good air circulation. Prevention is crucial: always allow the potting medium to dry out adequately between waterings, use a well-draining medium, and ensure the pot has sufficient drainage holes.
Can I grow Phalaenopsis orchids successfully in a purely inorganic medium, and what are the considerations?
Yes, Phalaenopsis orchids can thrive in purely inorganic media such as LECA (Lightweight Expanded Clay Aggregate), lava rock, or even semi-hydroponic setups. The primary considerations are nutrient delivery and watering. Inorganic media offer excellent aeration and reduce the risk of root rot from decaying organic matter, but they hold fewer nutrients. This means you’ll need to fertilize more frequently with a dilute, balanced orchid fertilizer, as the medium itself provides no nutrients. Watering frequency will also differ; semi-hydroponics involves a constant water reservoir, while LECA in a standard pot will require more frequent flushing than bark to prevent salt buildup. Careful monitoring of nutrient levels and pH is also more critical in such systems.