
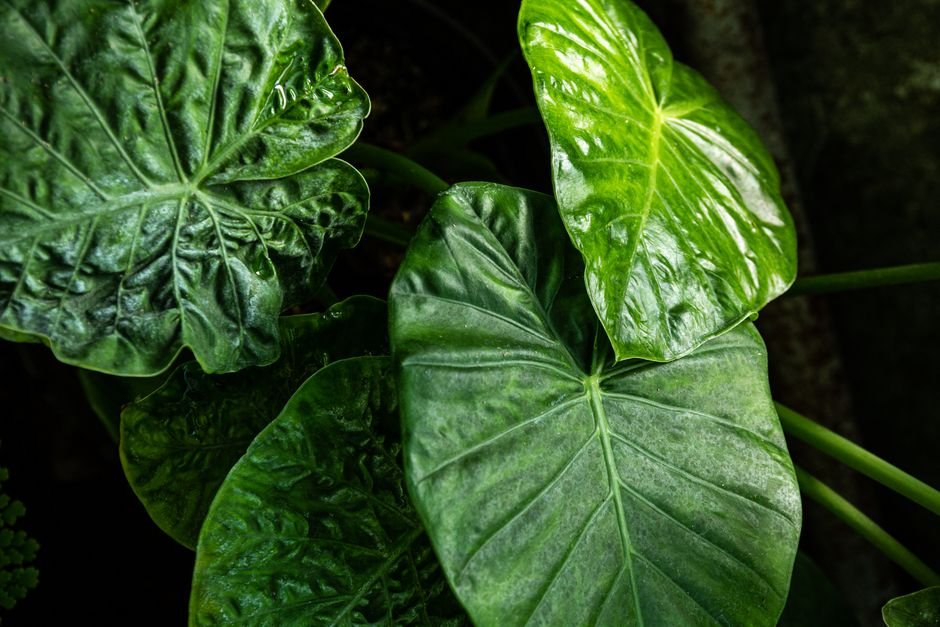

Welcome, fellow plant enthusiasts! As a senior horticulturist at PlantsMag.com, I’m thrilled to guide you through the nuanced world of Alocasia Polly care. Known for its dramatic, dark green leaves with striking silvery-green veins and deep purple undersides, the Alocasia ‘Polly’ (often marketed as Alocasia Amazonica ‘Polly’) is a true showstopper. While its exotic beauty can intimidate some, with the right approach, this tropical gem can flourish in your indoor garden. Let’s dive into creating the perfect environment for your Alocasia Polly to thrive.
Illuminating Your Alocasia Polly: Light Requirements
Alocasia Polly thrives in bright, indirect light. Think of its native rainforest understory: plenty of dappled sunlight filtering through a dense canopy, but rarely direct, harsh rays. An east-facing window is often ideal, providing gentle morning sun. A north-facing window can also work, though it might require supplementary lighting during darker winter months. South or west-facing windows can be too intense; if these are your only options, ensure your plant is several feet away or shielded by a sheer curtain to prevent scorching its delicate leaves. In environments with insufficient natural light, a full-spectrum LED grow light, such as models from Sansi or Barrina, set on a timer for 10-12 hours daily, can provide the consistent illumination your Alocasia craves.
The Art of Watering and Humidity for Alocasia Polly
Watering Alocasia Polly requires a delicate balance. They prefer consistently moist, but never waterlogged, soil. Allow the top 1-2 inches of soil to dry out before watering again. Overwatering is a common killer, leading to root rot, while underwatering can cause leaves to droop and brown. A reliable moisture meter, like those from XLUX or KORAM (typically under $15), can be an invaluable tool to accurately assess soil moisture levels. Always use lukewarm, filtered, or distilled water, as Alocasias can be sensitive to chemicals found in tap water.
Humidity Hacks for Alocasia Polly
Originating from tropical rainforests, Alocasia Polly demands high humidity, ideally 60% or above. Dry indoor air, especially during winter with heating systems running, is a common stressor. Here are several effective ways to boost humidity:
- Humidifier: The most effective method is a dedicated room humidifier. Small units can be purchased for around $30-$50.
- Pebble Tray: Place your plant pot on a tray filled with pebbles and water, ensuring the pot’s bottom doesn’t sit directly in the water. As the water evaporates, it creates a localized humid microclimate.
- Grouping Plants: Plants naturally release moisture through transpiration. Grouping several humidity-loving plants together can collectively raise the ambient humidity.
- Misting: While misting provides only a temporary boost, consistent daily misting with filtered water can offer some relief, especially if combined with other methods.
Crafting the Ideal Environment: Soil and Potting
The right soil mix is crucial for Alocasia Polly’s health. They need a well-draining, airy, and nutrient-rich substrate that retains some moisture but prevents waterlogging. A standard potting mix is often too dense. I recommend a custom aroid mix: combine equal parts high-quality indoor potting mix, perlite (for drainage), and orchid bark or coco coir (for aeration and moisture retention). You can buy these components individually at garden centers for a total cost of $20-$30 to make a substantial batch.
Choosing the Right Pot for Alocasia Polly
Drainage is paramount. Always select a pot with drainage holes. Terracotta pots can be excellent as they allow the soil to breathe and dry out more quickly, which can be beneficial if you tend to overwater. However, plastic or glazed ceramic pots also work well, just be mindful of your watering frequency. Alocasia Polly prefers to be slightly root-bound, so avoid repotting into a pot that is too large. Typically, moving up one pot size (e.g., from a 4-inch to a 6-inch pot) every 1-2 years is sufficient.
Nourishing Your Jewel: Fertilizing Alocasia Polly
During its active growing season (spring and summer), Alocasia Polly benefits from regular feeding. Use a balanced liquid houseplant fertilizer (e.g., a 20-20-20 or similar NPK ratio) diluted to half strength, every 2-4 weeks. Brands like Dyna-Gro or Liqui-Dirt offer excellent options, typically costing $15-$25 for a bottle that lasts several seasons. Reduce or cease fertilization entirely during fall and winter when the plant’s growth naturally slows. Over-fertilization can lead to nutrient burn, so always err on the side of caution.
Protecting Your Plant: Common Pests and Diseases
Alocasia Polly can be susceptible to common houseplant pests, particularly spider mites, thrips, and mealybugs. Regularly inspect the undersides of leaves and along stems. If you spot any pests, promptly treat them with insecticidal soap or neem oil. A thorough wipe-down of leaves with a damp cloth every few weeks can also deter pests and keep foliage clean. Fungal issues like root rot are primarily caused by overwatering. Ensure proper drainage and allow the soil to dry adequately between waterings to prevent this.
Repotting Your Alocasia Polly
Repotting your Alocasia Polly is a crucial step for its long-term health, typically needed every 1-2 years or when you notice roots growing out of the drainage holes. Here’s how to do it effectively:
- Prepare Your Materials: Gather your new pot (only 1-2 inches larger in diameter than the current one), fresh aroid-specific potting mix, and gloves.
- Gently Remove the Plant: Carefully tip the plant on its side and slide it out of its current pot. Avoid pulling the stem.
- Inspect Roots: Gently loosen any circling roots. Trim away any mushy, black, or foul-smelling roots, as these indicate rot.
- Add Fresh Soil: Place a layer of fresh potting mix at the bottom of the new pot.
- Position the Plant: Center your Alocasia in the new pot, ensuring the top of the root ball is at the same level as it was in the old pot.
- Fill with Soil: Backfill around the root ball with fresh potting mix, gently tamping it down to remove large air pockets. Leave about an inch of space from the rim of the pot.
- Water Thoroughly: Water your plant thoroughly until water drains from the bottom.
- Post-Repotting Care: Place the repotted Alocasia in a slightly shadier spot for a week or two to help it recover from the shock before returning it to its usual bright, indirect light.
Alocasia Polly Care Requirements Summary
| Requirement | Ideal Conditions |
|---|---|
| Light | Bright, indirect light (east-facing window or filtered south/west) |
| Water | Keep soil consistently moist, but not waterlogged. Allow top 1-2 inches to dry between waterings. Use filtered/distilled water. |
| Humidity | High (60%+). Use a humidifier, pebble tray, or group plants. |
| Soil | Well-draining, airy aroid mix (potting mix, perlite, orchid bark/coco coir). |
| Temperature | Warm (65-80°F / 18-27°C). Avoid drafts and sudden temperature drops. |
Frequently Asked Questions About Alocasia Polly Care
Why are my Alocasia Polly leaves turning yellow?
Yellowing leaves often indicate overwatering, nutrient deficiency, or sometimes natural aging of older leaves. Check your watering schedule and soil moisture. If the soil is consistently wet, reduce watering. Consider a balanced liquid fertilizer during the growing season. If it’s just an older leaf, the plant may be reabsorbing nutrients before shedding it.
Why are the edges of my Alocasia Polly leaves turning brown and crispy?
Brown, crispy leaf edges are a classic sign of low humidity or underwatering. Increase humidity around your plant using a humidifier or pebble tray. Also, check your soil moisture; ensure you’re watering thoroughly when the top few inches are dry, and avoid letting the soil become bone dry.
Is Alocasia Polly toxic to pets or humans?
Yes, Alocasia Polly, like other Alocasias, contains calcium oxalate crystals, which can cause irritation to the mouth, throat, and digestive system if ingested. It is considered toxic to pets (cats, dogs) and humans. Keep it out of reach of children and pets.
Do Alocasia Polly plants go dormant?
They can. In cooler temperatures or low light conditions during winter, Alocasia Polly may enter a period of dormancy, shedding most or all of its leaves. Don’t despair! Reduce watering significantly and stop fertilizing. Keep the corm (underground stem) warm and slightly moist. New growth typically emerges in spring as conditions improve.
How often should I fertilize my Alocasia Polly?
During the active growing season (spring and summer), fertilize every 2-4 weeks with a balanced liquid houseplant fertilizer diluted to half strength. Discontinue fertilization during fall and winter dormancy periods.
Conclusion
The Alocasia Polly, with its dramatic foliage, is an incredibly rewarding plant to cultivate indoors. By providing consistent bright, indirect light, maintaining high humidity, using a well-draining soil mix, and adopting a mindful watering schedule, you’ll ensure your ‘Polly’ not only survives but truly thrives. Don’t be afraid to experiment slightly to find the perfect microclimate in your home. Happy growing!
Advanced Pro Tips for Alocasia Polly Mastery
Elevate your Alocasia Polly care with these experience-based insights, transcending basic recommendations for truly thriving indoor cultivation:
1. The Art of Substrate Aeration & Root Zone Optimization
Beyond a mere “well-draining” mix, achieving optimal root health for Alocasia Polly hinges on superior substrate aeration. These plants are highly susceptible to root rot in compacted or waterlogged conditions. Aim for a chunky aroid mix comprising at least 50-60% large particulate matter such as orchid bark, perlite, pumice, coco coir chunks, and even a small amount of horticultural charcoal. The goal is to maximize air pockets, ensuring consistent oxygen flow to the roots. Consider using clear nursery pots to visually monitor root development – healthy roots should appear plump, white, or light tan. Brown, mushy, or stringy roots are tell-tale signs of anaerobic conditions or overwatering, necessitating immediate repotting into a more porous medium.
2. Mastering Microclimates & Environmental Acclimation
Alocasia Polly thrives not just in high humidity, but in *stable* high humidity (ideally 60-80%) and consistent temperatures (65-80°F / 18-27°C). Fluctuations are a major stressor. Avoid placing your plant near drafts from windows, doors, or HVAC vents, which can cause rapid humidity drops and lead to leaf crisping or yellowing. When introducing a new plant or moving an established one to a different location, acclimate it gradually over several days to weeks. For plants undergoing stress, recovering from shipping, or during propagation, creating a temporary “mini-greenhouse” (e.g., using a clear plastic bag or cloche) can significantly reduce transpiration shock and aid recovery, provided adequate ventilation is maintained to prevent fungal issues.
3. Micronutrient Focus & Strategic Foliar Feeding
While NPK fertilizers are essential, Alocasia Polly benefits immensely from specific micronutrients, particularly calcium (Ca) and magnesium (Mg). These elements are crucial for robust cell wall development, strong petioles, and preventing common deficiencies like interveinal chlorosis (yellowing between leaf veins). Supplement with a Cal-Mag solution every 2-4 weeks during the active growing season, especially if you’re using filtered or rainwater, which often lack these minerals. Additionally, incorporate occasional foliar feeding with a diluted, balanced liquid fertilizer. This method allows for rapid nutrient absorption directly through the leaves, providing a quick boost or addressing immediate deficiencies, which can be particularly effective if the root system is compromised or less efficient at nutrient uptake.
Frequently Asked Questions About Alocasia Polly Care
How do I prevent yellowing leaves on my Alocasia Polly, especially older ones?
Yellowing leaves on Alocasia Polly can stem from several factors, though a single older leaf yellowing and dropping when new growth emerges is a natural process. Widespread or rapid yellowing, however, often signals an underlying issue. The most common causes include: Overwatering, which leads to root rot and impaired nutrient uptake (always check the top 2-3 inches of soil before watering); Nutrient Deficiencies, particularly nitrogen or magnesium, which can cause general yellowing or interveinal chlorosis; Insufficient Light, leading to a decline in photosynthetic activity; and occasionally Pest Infestations (inspect the undersides of leaves for spider mites or other pests). Ensure your plant receives bright, indirect light, is potted in a highly aerated, well-draining mix, and is fed consistently with a balanced fertilizer containing essential micronutrients during its growing season.
My Alocasia Polly seems to go dormant or drop leaves in winter. Is this normal?
Yes, it is entirely normal for Alocasia Polly, especially when cultivated indoors, to enter a period of dormancy during the cooler, darker winter months. As light levels diminish and ambient temperatures drop, the plant conserves energy by shedding its leaves, sometimes appearing to ‘die back’ completely to just its corm (tuber) beneath the soil. During this phase, it’s crucial to significantly reduce watering, allowing the soil to dry out almost entirely between sparse waterings, and to cease all fertilization. Maintain moderate ambient humidity if possible. Do not discard the plant; its energy is stored in the corm. With the return of warmer temperatures and increased light in spring, it will typically re-emerge with vigorous new growth. You can gently unpot and inspect the corm during dormancy to ensure it remains firm and healthy.
What’s the best way to propagate Alocasia Polly?
The most successful and widely recommended method for propagating Alocasia Polly is through the division of its corms or rhizomes. As a mature plant grows, it naturally produces small ‘cormlets’ or offsets at the base of the main stem or along its subterranean rhizome. To propagate: 1. Carefully unpot the mother plant. 2. Gently remove excess soil to expose the root ball and any visible corms. 3. Identify healthy corms that are at least pea-sized and can be gently twisted or cleanly cut away from the main plant using a sterile, sharp knife. 4. Allow the cut surfaces of the corms to air-dry and callus over for a few hours, or dust them with cinnamon (a natural antifungal). 5. Plant the cormlets in a small pot filled with a very light, airy, and consistently moist propagation medium such as sphagnum moss, perlite, or a coco coir/perlite mix. Provide warmth, high humidity, and bright, indirect light. Roots and new leaves typically emerge within several weeks to a few months.